Sometimes, living in an RV can feel like living in a glass house. I mean … you can hear everything. If the camper’s a-rockin’ …
Then soundproof your RV!
This article is NOT an in-depth instructable how to soundproof your Class B conversion van. For that, you can check out this article, which assumes you’re beginning with a bare chassis body.
It’s also not geared towards quieting a motorhome in transit. You can read this article for that, which goes into more depth about soundproofing your wheel wells, engine compartment, etc.
No, this article is for the humble RV owner who just wants some peace and quiet, dammit!
- Maybe you’re tired of listening to the neighbors’ jokes getting progressively worse after 11:00 p.m. and a six-pack down.
- Maybe you’re anxious for some adult-time and the kids are only 30 feet down the hall!
- Maybe you’re tired of waking up in the morning at 3:00 a.m. when your water pump cycles on for 15 seconds.
In other words, this article is both for RVers who want to keep sound out as well as keep sound in.
Why Soundproofing Your RV Might Be a Waste of Your Time
So, let’s begin with some uncomfortable truths.
- You cannot reasonably soundproof your entire RV. That would be called “buying a custom RV.” Campers and motorhomes are not built with any attention to soundproofing whatsoever.
- Sound is like water – one leak can ruin everything. Because so much of your RV is metal, it transmits and amplifies sound very easily. Don’t expect to transform your Forest River into a recording studio, no matter how hard you work.
- Mass absorbs sound. And mass = weight. If you want to significantly reduce sound transmission in your camper, you’ll need to add weight. If you cannot afford to add weight, you’ll eventually hit a soundproofing ceiling.
- Sound is frequency-fickle. Materials that may absorb mid-range frequencies may do absolutely nothing for bass frequencies. You may need to experiment with multiple materials or configurations.
- The cheap, DIY, Pinterest-y solutions to soundproofing generally don’t work. That includes egg cartons, construction foam, egg crate foam, soundproofing paint, soundproofing wallpaper, and shag carpet. None of those hacks really work. At best, they “muffle” noise. They can “deaden” sound by reducing echos, but they don’t really absorb the acoustic energy.
- Forget most of the “soundproofing” insulation you’ll find at Home Depot or Lowes. Neither fiberglass nor construction foam is a good solution for soundproofing the interior of your RV.
- Lastly, at the risk of being snide, if your goal is to keep sound out of your RV, you might be best served with some foam earplugs or noise-canceling headphones. Soundproofing an RV is a lot of work. Earplugs aren’t.
With all those caveats out of the way, let’s begin!
A Quick Detour into Sound Science
I think it’s helpful to understand the four basic soundproofing principles:
- Mass: The greater the mass of an object, the more sound energy is required to cause vibration.
- Damping: Reduces the resonance of a space.
- Decoupling: Mechanically separating multiple objects so they vibrate independently.
- Absorption: Sound is deadened by absorbing acoustic energy as dissipating vibrations (usually in the form of heat).
If those don’t make much sense to you … then just understand that some materials can scatter sound, and some can swallow it. Those aren’t technical descriptions, but … ya know.
Scattering (or diffusing) sound improves the acoustics of a room, but only swallowing (or absorbing) sound reduces the total volume level.
Techniques to Soundproof Your RV
1. Use Soundproofing Curtains
Standard RV windows and shades offer almost no sound reduction. You can’t do anything about the windows unless you want to pony up some serious cash, but you can replace your window shades with acoustic curtains.
This won’t result in a significant difference in sound, but it helps. I suggest getting some dual black-out/sound-proofing curtains.
Side note: You can also use Reflectix window inserts to cover the windows (buy them or make your own). They also won’t reduce sound transmission by more than a decibel or two, but hey, every decibel counts!
2. Quiet that Water Pump!
If your water pump gives you a heart attack every time it kicks on, you can probably fix that!
Chances are that the pump (or a pipe connected to it) is pulsing against something rigid, like a piece of plywood, which is amplifying the rattle like a drum kit.
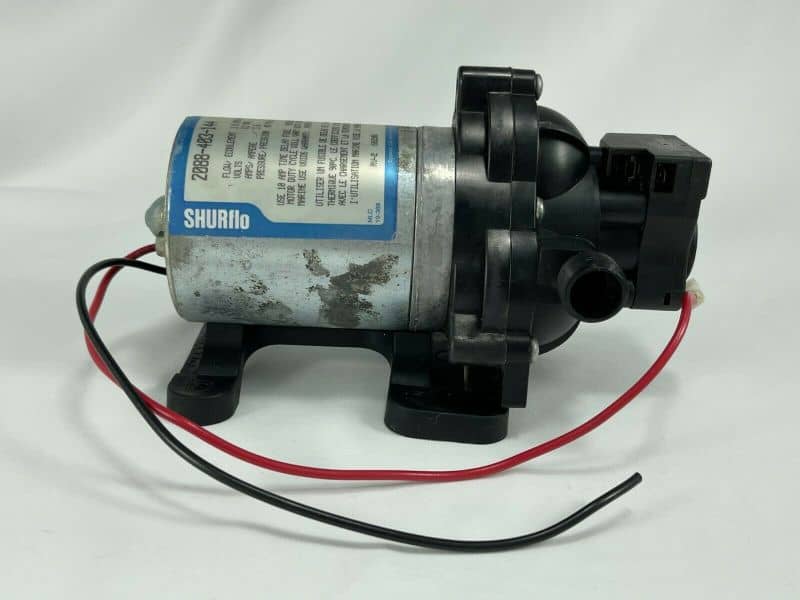
You can fix a loud RV water pump by adding flex lines between the water pump and rigid pipe, by mounting the water pump on an anti-vibration rubber base, or by wrapping the PEX pipes in foam pipe insulation.
You can learn more about troubleshooting a noisy or defective water pump here.
3. Silence the Generator
Most RV generators are housed in the “basement” of the 5th wheel or motorhome. The generator compartments are fully enclosed and separate from the rest of the RV.
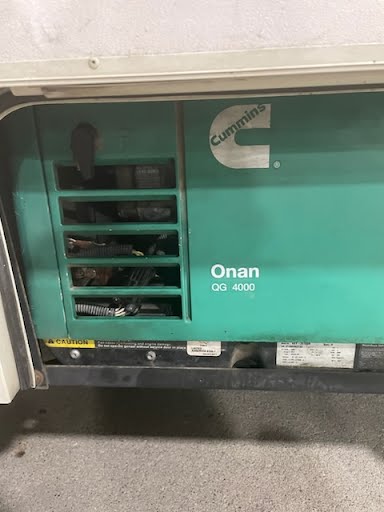
That makes your job easier. Stock up on some mass-loaded vinyl (MLV) soundproofing tiles and get to work! Line the interior of the compartment, especially the floor and walls, with the tiles. Be sure to use aluminum-faced tiles that can withstand the heat of the compartment.
You can also remove your generator and re-install it on top of a vibration-dampening rubber pad designed for heavy-duty machinery. This will help isolate the structural vibrations as well as the airborne noise.
4. Silence Your Air Conditioner
RV air conditions are loud because of the blower fans, and you can’t change that very easily. Easiest solution: Run your air conditioner with the fan speed on Low.
If you have a ducted system, you can check out an AC silencer kit from Wacko Products.
5. Spray Your Underfloor & Wheel Wells
If you’re trying to sound-deaden your wheel wells or underbelly, you can try a good spray-on sound deadener.
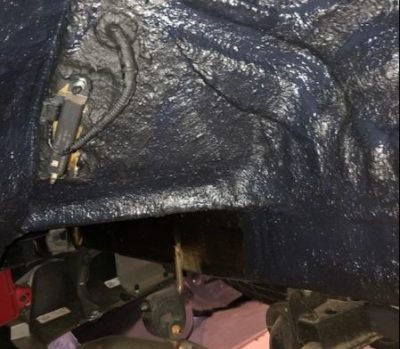
There are many thick, spray-on sound deadener products on the market. Some popular ones include Second Skin Spectrum and Sound Cow Silent Running.
Fair warning – this stuff is thick! And the thicker, the better.
6. Stuff Your Cabinets
If you’re trying to isolate your bedroom, you might be able to stuff insulation in the cabinets between the bedroom and the surrounding rooms.
Here are some of the materials you can use to insulate the insides of your cabinets:
- Acoustic polyester felt
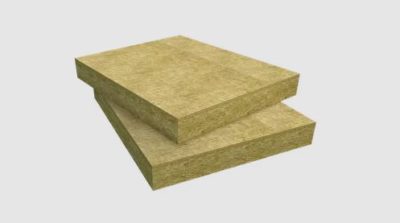
- Mineral wool insulation
- Soundproof floor underlayment
- MLV tiles
Don’t use fiberglass! It’s a haven for rodents. Plus it’s super scratchy. And don’t use drywall, which is far too heavy, and will crack in an RV.
7. Use a Rug
Rugs and runners absorb and muffle the sound of footsteps from the other side of the RV. Very useful if one person has to visit the restroom in the middle of the night!
8. Sweeps, Seals and Gaskets
You can reduce sound transmission between rooms by adding door sweeps to undercut doors. And se hollow D-bulb weather-stripping to help close gaps between a door and its jamb.
Anywhere air can get through, so can sound. Seal gaps and cracks with quarter-round trim (or spray foam, if hidden) to shut out sound bypass channels.
9. Soundproof the Walls and Ceiling
Alright, I saved the best for last. This is where most of the soundproofing magic happens.
Because most sound sources come from around you, and not above you, start with soundproofing the walls.
If that’s not enough, move on to the ceiling.
And if that’s still not enough, move on to the floors.
There are quite a few options depending on your budget and cosmetic senses. You can stick with good ol’ mass-loaded vinyl (MLV), which works great, but is heavy and looks about as attractive as engine oil. Doesn’t smell much better, either.
So rather than MLV, if you’re looking to add mass, you can try adding plywood, rubber foam – or better yet, a sandwich of several materials!
You can use classic baffled acoustic studio panels, made from high-density acoustic foam. Some are peel n’ stick! You can also buy acoustic foam in a roll, which is easier to sound-deadening curved roofs.
Or you can hang beautifully upholstered thick acoustic wall panels on your walls and ceilings like so many pictures. The thicker, the better (½” minimum, 2” maximum).
Or you can hang soundproofing blankets (or even just moving blankets!) from the ceiling.
Personally, I like the idea acoustic PET felt. (I haven’t used it myself, but I’ve heard good things).
- It absorbs sound as well as many acoustic foams.
- It can be easily installed with spray glue or double-sided VHB tape.
- Compared to designer acoustic panels, it’s quite affordable.
- It’s available in several colors, and you can always upholster it yourself.
- It’s lightweight enough to be installed on either walls or ceilings.
Non-toxic, pet-friendly, and environmentally friendly!
One last note about soundproofing materials: Pay attention to the NRC rating! The closer to 1, the better. If the product doesn’t have an NRC rating, don’t buy it!
I leave you with a repeated warning: Your RV probably wasn’t designed with any attention to soundproofing. Don’t spend obscene amounts of money putting lipstick on a pig. When in doubt, wear those earplugs (or pass them out).
If you have any other tips, I’d love to hear about them!
Leave a Reply