A roof leak is every RV owner’s worst nightmare. It’s scary clowns, black holes, teeth falling out, and going to work naked all rolled into one.
If you’re buying or inspecting your RV, a roof leak needs to be the first thing you check. If you’re an RV owner, you should be checking your roof twice a year! Or immediately after venturing into the forested boondocks.
But unless you have a practiced eye, you may not know where to begin!
I’ll tell you about common causes of RV roof leaks. You’ll learn how to survey and inspect an RV roof like a private eye. No leak will go unnoticed!

Different Types of RV Roof Materials
Before we get into the root causes, let’s talk about what type of RV roof you have.
Here’s an abbreviated excerpt from my article about sealing the outside of your RV.
Your roof has a hard job. Come rain or shine, Arizona sunlight or Michigan snow, bird poop or 70-mph winds, your roof must do its job day in, day out, with zero complaints.
What makes for a high-quality roofing material?
- UV resistance (no chalking, no fading).
- Remains flexible throughout its lifetime (no migrating phthalate plasticizers).
- Highly reflective, keeping the RV cooler in warm weather.
- Retains its high performance even in severe cold or hot weather conditions.
- Waterproof, even with ponding water and wind-driven water.
- Not affected by environmental contaminants like gasoline, motor oil, road salts, bird poop, acid rain, etc.
- Resistant to abrasion, scratches, punctures, and dents.
- Repairable and replaceable.
- Lightweight, but rugged.
You’ll find one of five types of roofs on your RV.
- Rubber roofing
- Aluminum coil
- Gel-coated fiberglass sheeting
- Molded fiberglass
- Automotive sheet metal
Membrane “Rubber” Roofing
Membrane single-ply sheet roofing (aka, rubber roofing) has been the mainstay of the RV industry for decades. Chemical compositions have been tweaked, but they all work the same:
Plastic rubber sheeting, pulled off a giant roll, is loose-laid or glued atop the roof OSB or plywood sheathing. Holes are cut in the membrane for pipe penetrations, roof fans, air conditioner holes, etc.
Common types of membrane roofs include:
- EPDM
- TPO
- PVC
Most membrane RV roofs are EPDM, although TPO and PVC have made inroads in recent years. Different chemical compositions and manufacturers will claim one chalks less, one reflects more heat, one is more tear-resistant, etc.
Some membranes, like Dicor’s BriteTEK, have a fleece or woven backing for enhanced adhesion to the underlayment roof decking.
Coil Aluminum
A few vintage or specialty trailers will use thin sheet metal, either bare (mill finish), anodized (acid bathed) or painted (usually Kynar) as roofing.
Aluminum is usually NOT glued to the sheathing underlayment. Instead, it is loose-laid (also known as floating) and then mechanically secured around the edge and cut-outs.
Most RV aluminum roofs are seamless. A few may have riveted lap seams. It’s rare to see welded seams since welding thin-gauge aluminum requires a great deal of operator skill.
Gel-Coated Fiberglass
A few specialty trailers, such as mega-sized teardrops, will use gel-coated aluminum seamless sheet for the roof. This is the same or similar quality fiberglass to what’s used on your laminated sidewalls.
Gel-coated fiberglass roofs are almost always seamless.
Molded Fiberglass
Ah, the wonderful molded shell! You have no separate roof! Your one-piece or two-piece molded fiberglass camper shell has a strong, waterproof fiberglass shell all the way around.
To learn more about maintaining your roof, find out how to seal the outside of your RV and read my list of favorite caulks and sealants.
Automotive Sheet Metal
If you’re rockin’ a Class B conversion van, such as a Sprinter Van, you probably have a roof made from automotive sheet metal, which can be aluminum or steel.
These roofs are often not considered “walkable.” However, they may last longer than any other type of roof because of their automotive-grade paint protection!
Signs of a Leaking RV Roof
Beyond the obvious signs (like water in the interior and brown spots on the ceiling), here are some tip-offs that your RV roof may be leaking!
- Warm, humid air emanating from the rear of cabinets. Often caused by growing mold in the adjacent sidewalls or roof. If you see black or brown spots nearby, you’ve got mold. You can learn more about mold and mildew in an RV at my guide to RV’s indoor air quality.
- Rippled, wavy, or swelling roof membrane. This is a sign that water has gotten into the underlying plywood and caused the wood to swell or disintegrate.
- Spongy, soft spots when walking around the roof. Again, this is a sign that the plywood underneath is compromised.
- A sudden peak or valley across the roof. Another sign that the plywood has been compromised, and that the fasteners that hold the plywood to the roof trusses have let go.
- Delaminated sidewalls or spongy subfloors can be caused by water leaks that originate from the roof!
- Hard-to-clean stains in repeat areas. Puddling water can cause permanent staining to almost any surface, even fiberglass.
The frustrating thing about RV roof leaks is that the sign of a roof leak is often nowhere near the leak itself! Your front window may be leaking, but the sign shows up a spongy subfloor in the front right corner. Your rooftop AC gasket may be leaking, but the water doesn’t stain the ceiling until it meets the sidewall eight feet away!
As they say, an ounce of prevention is worth a pound of cure. Or as we engineers like to say, a gram of prevention is worth a kilo of cure. You get the idea.
Common Causes of RV Roof Leaks

1. Roof Puncture
If you have a membrane roof, chances are it’ll get punctured at some point. Tree branches are usually the culprit.
Punctures need to be sealed immediately. They are an open wound!
Self-adhering tape is the best fix for a rubber roof puncture. The surrounding area should be thoroughly cleaned and dried. Then the tape – EternaBond is a favorite! – should be applied with hand pressure and a 2-inch roller.
For extra insurance, you can apply self-leveling roof sealant over the roof repair tape.
2. Cracked Self-Leveling
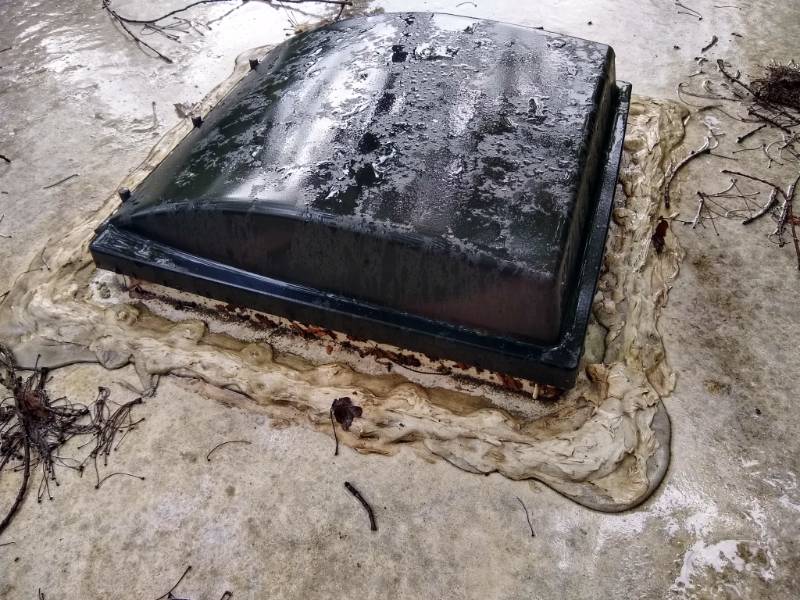
Self-leveling sealant is applied around the edges of roof fans, pipe vents, attic vents, and other roof penetrations.
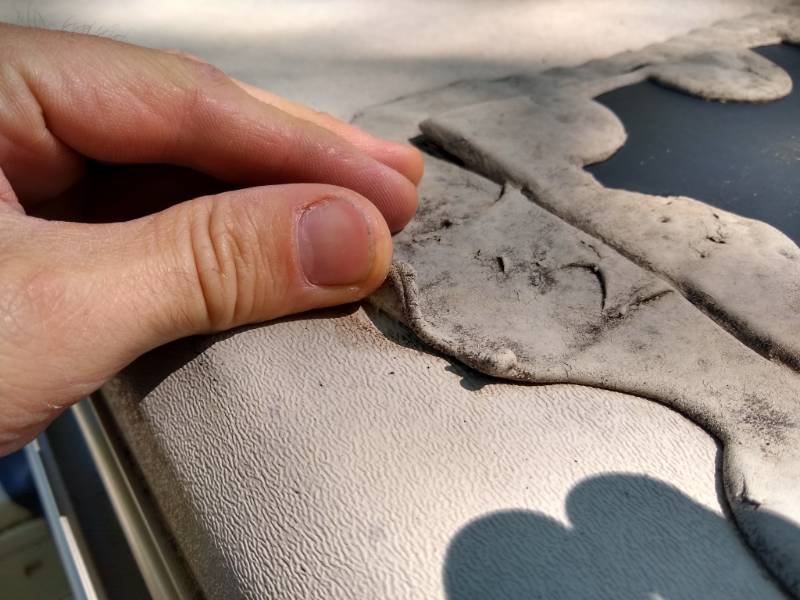
Most self-leveling compounds will become brittle and crack over time. Severe cracks can cause complete separation, allowing water to bypass the self-leveling and enter your RV!
This is a common problem around the following components:
- Roof fans
- Attic vents
- Skylights
- Pipe vents
- Antennas
- Wire ports
Some types of self-leveling, like Dicor 501, can be reapplied over old sealant. Other types need to be mechanically scraped away, and new sealant reinstalled.
3. Bad Roof Trim Butyl Seal
There is usually a piece of aluminum trim (also known as “moulding”) protecting the edges of your RV roof, where your roofing material meets your sidewall.
Traditionally, these edges are protected with nothing more than the aluminum trim and a strip of ⅛” thick, 1” wide butyl tape underneath. The butyl tape squishes into a malleable seal, protecting the joint.
That’s the theory, anyway. In practice, the butyl tape can crack or cold flow, leaving gaps. That’s why most modern manufacturers use at least one extra layer of protection. Most manufacturers apply a cap or lap sealant against the edges of the roof-edge trim, like Dicor 551. Some manufacturers even tape the roof-edge joint with a EternaBond or Seal-Tite tape.
If your roof-edge trim is in fair-to-good condition, you might get away with just maintaining that cap sealant every year. But if your roof-edge trim is in poor condition, the best solution is to remove it completely and re-install. This is a long, messy job, best performed on a hot summer’s day where the butyl tape is loose and ductile.
When reinstalling roof-edge trim, be sure to tape the seams first! – and then follow up with a 1” wide piece of butyl tape, then the aluminum trim, and finally a UV-resistant cap sealant. You may also need to replace the vinyl cover inside the trim, too.
Note: If you have corrugated aluminum sidewalls, be careful! You’ll need at least two layers of butyl tape to squeeze into the valleys. Personally, I recommend using Seal-Tite Corner Seal tape for this application, as well as the butyl.
Also, pay particular attention to the front and rear corners of the roof! These are high-risk areas for water penetration.
4. Air Conditioner Foam Gasket
Most rooftop air conditioners are installed with a thick foam rubber gasket between the roof and the AC body. If this gasket was installed improperly or has aged, it may no longer be doing its job.
The solution is simple: Remove the air conditioner, install a new gasket, and replace! There shouldn’t be any need to cut wires. Simply shift the AC a few inches up and to the side to allow access to the 14×14” roof vent hole.
5. Forgotten Screw Head
If you’ve recently installed a roof rack, ladder or another roof component, you may have forgotten to seal the screw heads!
Even if you use neoprene rubber washes underneath the screw head and a butyl tape gasket, screws can still allow water to leak inside. That’s why all screw and fastener heads should be covered with self-leveling caulk.
This problem commonly pops up around:
- Roof rack
- Ladder mounts
- Lap seams
- Solar panel mounts
6. Super Old RV Roof
If you peek on top of your RV roof and see pyramids of bird droppings, flaky sealant, cracked caulking, dirt and grime, extensive chalking and ripples all over, you’re looking at an RV waaaaaay past its prime.
Most membrane roofs will last about 20 years. Without maintenance, they might wear out in just 10-12. Cleaning and maintaining your roof, as well as storing your RV in a covered location, will extend its lifespan.
If you’re looking at an old RV roof, your only solution to prevent future leaks might be a complete roof replacement. And no, that’s not cheap!
Want to Avoid RV Roof Leaks?
Hey, who doesn’t?!
- Use the right stuff! Read my list of favorite caulks and sealants.
- Thoroughly inspect your roof at least twice a year. Walk on it, if you can!
- Store your RV indoors or under a canopy.
- Consider a lifetime RV roof coating like RV Armor.
- Get valuable results from a pressurized air test from Seal-Tech. You need to call around local RV service centers to inquire who has this equipment.
If you have a roof leak, don’t delay! Fix it immediately! And don’t assume a patch will fix the situation. Water might have already seeped into your RV attic. Consider using some powered fans and a dehumidifier to dry out your RV as quickly as possible.
Leave a Reply