I may sound like a broken record, but I’ll say it again: Don’t treat your RV like you treat your car.
You can drive a Honda CRV for 16 years and 260,000 miles, never paint the underbody, endure harsh northeastern winters, never go through a carwash – and not even get a pinhole leak in the exhaust pipe.
(Just look in my garage for all the proof you need).
If you put that many miles on your travel trailer without attending to the underbody and frame, I’d wager a wheel or two would fall off.
More than one new RV owner has felt the piercing pain of peeking under a 7-month-old RV to find a rusty, ochre steel frame and peeling, faded paint.
Ouch. Who’s to blame??
Is RV Frame Rust Covered Under Warranty?
Regrettably, trailer frame rust is often NOT covered under the standard RV warranty.
- Your dealer will blame the manufacturer for using shoddy materials.
- Your manufacturer will blame the dealer for not washing off the road salts when the RV first arrived at the dealership.
- Or your manufacturer might blame Lippert or Norco/BAL as the “3rd party supplier.”
It’s really frustrating, isn’t it? Even if frame rust is covered by the warranty, many RV warranties are only one year long. You might have no option but to fix it yourself.
If you’re wondering how to repaint and repair a rusty travel trailer frame, you’ve found the right guide!
(Or better yet, how to undercoat an RV for semi-permanent protection!)
In addition to being an RV engineer, I’ve restored a handful of utility trailers. Painting a chassis frame isn’t necessarily difficult, but it is a lot of sweaty, dusty work. I hope to set you off in the right direction so you don’t waste time.
Why Do RV Trailer Frames Rust So Quickly?
Everyone knows water, either rain or humidity, will rust steel. It’s a chemical process called oxidation.
Rust is the steel’s way of protecting itself from further damage. Unfortunately, rust is usually loose and flaky, so it doesn’t do a very good job. Mother Nature wins eventually!
Fun fact: There are steel alloys, called weathering steel or Cor-Ten steel, which develop a much stronger, more durable layer of rust for long-lasting protection. Weathering steel is often used on bridges and architectural elements. It doesn’t have to be painted.
Salt accelerates the rusting process because it dissolves in water to form an electrolytic solution (sorry for the big words!). As you may remember from my geek’s guide to your RV battery, an electrolyte is how a battery transfers electrons from cathode to anode –
Well, we’re getting too technical here. You already know the result: Salt kills steel. That’s one reason winter driving can be so hard on your RV.
And the only thing standing in the way of your frame and total environmental annihilation is: The paint!
How Are RV Frames Finished From the Factory?
There are four basic methods to finish an RV chassis frame:
- E-coated
- Powder-coated
- Painted
- Galvanized
There’s nothing inherently wrong with any of these methods! They all have their pros and cons.
- Galvanizing is arguably the most durable, but it’s the most difficult to weld onto.
- Painting can provide excellent performance, but it requires skilled labor and careful cleaning.
- Powder-coating has excellent abrasion resistance, but touchup is finicky.
- E-coating gives great coverage, but the film is incredibly thin – generally no more than 1-2 thousandths of an inch!
Many of these methods work best when the entire frame, not just individual parts, are dipped/spray/baked.
The most popular method (by far) is e-coating. That’s how Lippert and BAL finish most of their RV frames.
And … Here’s where we have to get uncomfortably honest.
It’s no secret that travel trailer frames have the worst reputation for rusting of any RV type. That’s because they’re typically built to the lowest price point.
In contrast, luxury 5th wheels and motorhomes may have the frame coated with a heavy rubberized undercoat from day one!
It’s also no secret that Lippert builds the huge majority of the travel trailer frames in the RV industry. And this B2B relationship is … complicated. Because Lippert will shrug and say, “We build to the manufacturer’s specs.”
But the manufacturer will protest, “It’s not our job to specify minimum e-coating thicknesses! And Lippert leverages its monopolistic power to herd all its vendors to the same price point, same design, and same quality finish so that they can quickly fulfill orders.”
(And we haven’t even talked about the dealer, who really should wash off those road salts before letting the trailer sit outside for 8 months!)
Like I said, it’s complicated. Even if you purchase from a smaller manufacturer, you’re not always guaranteed top-tier quality.
Most “job shop” manufacturers don’t have access to the huge vats or ovens required for full-chassis e-coating or powder-coating. So they paint. And there’s a huge difference in quality between a rattle-can acrylic and 2-part catalyzed urethane.
There’s also a huge difference in film thickness consistency between a painter with 20 years’ experience vs. a rookie who leaves runs and overspray and forgets to prime the welds.
Plus, you’ve probably heard the saying “paint is only as good as the prep.” Unless the frame is carefully sandblasted or acid-washed (and don’t forget about degreasing and priming the welds!), then the topcoat won’t hold up.
So for one reason or another, most travel trailer or 5th wheel frames will require paint touchup in order to last 10+ years without severe rust.
Not saying motorhomes are exempt from poor paint jobs. But as a rule, factory-finished chassis from Ford, Ram, Mercedes-Benz, Freightliner, Spartan, and other chassis manufacturers tend to last much, much longer.
How to Prevent Rust on an RV Chassis Frame
Get ahead of the game. As the old saying goes, “An ounce of prevention is worth a pound of cure.”
I don’t agree with the claim that “surface rust is nothing to worry about.”
While it is true that surface rust doesn’t structurally weaken the metal, it’s visual proof that your frame is naked and unprotected. And any rusty areas will blossom as water peels off the surrounding metal.
Wash Your RV Underbody
At a bare minimum, wash the underside of your RV after every trip, especially after driving in the winter, or before going into storage.
Undercoat Your New Camper
Even better, go undercoat your camper! Right now! Don’t wait for rust spots to start blossoming! That’ll just weaken the bond between the undercoat and the frame.
If you’re serious about preventing rust on your RV frame for the lifespan of the RV, you should undercoat your RV first thing.
This is a dirty, messy job that you’ll probably pay someone else to do. Doing it yourself with an aerosol undercoating spray is expensive and unhealthy.
If you’re dead set on doing it yourself, though, or if you only need to coat a small area, you can go with 3M Professional Grade Black Rubberized Undercoating or Rustoleum Professional Grade Rubberized Undercoating.
Don’t buy some no-name knockoff cheap undercoating products. These chemical concoctions are often 30% solvents or more by weight. They’ll shrink, flake, and won’t stick to anything remotely dirty.
Genuine undercoating is quite thick (10-30 mils), 4-10x thicker than paint. You can get wax, asphalt, polyurethane, or rubber-based coatings. The good, thick stuff is usually applied with a disposable Shultz spray gun and should last the lifespan of your camper.
Use a Rust-Proofing Product
If you can’t afford a true undercoating, go for a rust-proofing spray (aka rust inhibitors, corrosion protectants).These sprays (some are brush-applied liquids) are usually a grease, wax, or oil. They form a sacrificial layer and will slowly wear off over time.
One of the most popular rust inhibitors is called Fluid Film.
Most rust inhibitor products should be reapplied every 1-3 years. If you travel in the winter, you’ll need to reapply more often. They absolutely do work, but they’ll require more maintenance than a permanent undercoating.
How to Repaint a Rusty Travel Trailer Frame?
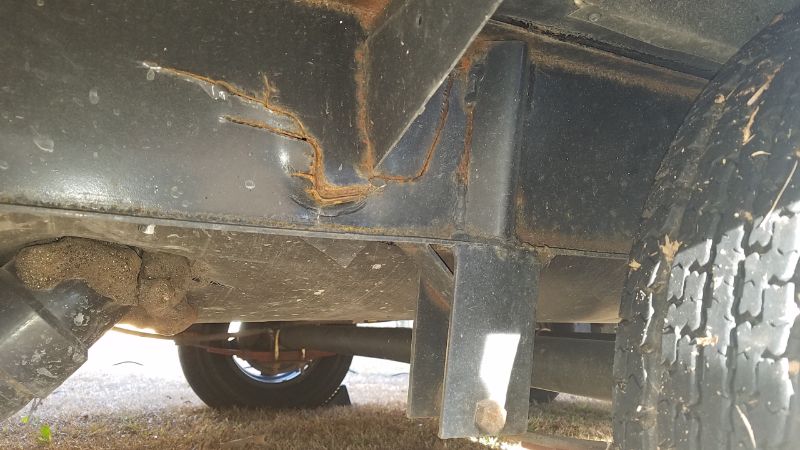
If you didn’t take my ^advice, you’re likely now facing a rusty trailer frame after a few years of ownership, possibly with deep flaking or pitting.
How to repair a rusted trailer frame is simple, but not necessarily easy. It’s a 5-step process.*
- Remove loose rust
- Convert hardened rust
- Tape and protect the work area
- Clean, prep, and prime the metal
- Apply the topcoat
*And this assumes the metal is worth saving. Considering that many RV chassis components are made with 14-gauge steel (0.080 inches thick), it doesn’t take much rust to ruin a part!
1. Remove Loose Rust
In theory, this is where you bust out your sandblaster and return the frame to bare metal, but seeing as that’s unlikely …
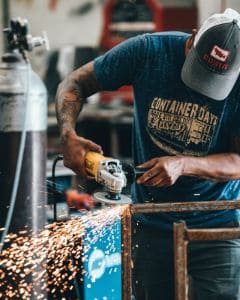
You’ll need a stiff wire brush, a wire brush drill attachment, or an angle grinder with an abrasive flapper disc. Don’t waste time with steel wool or a toothbrush or anything like that.
I vote for the angle grinder. You’ll save boatloads of time.
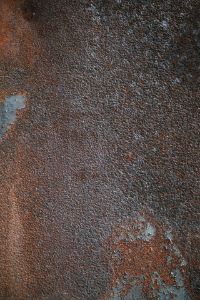
At a minimum, you’ll need to remove all loose, flaky, or peeling rust. No exceptions.
If you’re willing to grind the rust off down to bare metal, that’s good too, but not always necessary. And some primers designed to work on rusty metal don’t work on bare metal and vice versa.
2. Convert the Hardened Rust
If you have a deeply rusted frame, don’t skip this part!
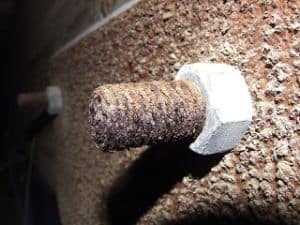
You need to neutralize, convert, and seal the rust. You need to use a product like Eastwood Rust Converter, POR-15, or Rustoleum Rust Reformer that chemically converts the remaining rust into a more durable, non-rusting surface.
If you cheap out on a rust converter, at least prime any rusty areas with a metal primer designed for maximum adhesion.
3. Tape the Area/Protect Yourself!
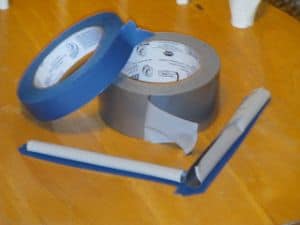
Use painter’s tape, cling firm, and tarps to protect the RV underbody and your work floor from damage. My favorite painter’s tape is Frog tape.
Pay attention to your own PPE. Don’t get nasty paints and primers all over your skin. Wear long sleeves, work in a well-ventilated area, and wear a NIOSH respirator to protect your lungs from solvents.
4. Clean and Prep the Metal Surfaces
90 percent of painting is prep work! You’ll need to thoroughly clean any part of the chassis that will be painted.
Start with a degreaser to remove road grime and film protectants. Clean that up with mild soap and water. Then rinse with just water – and immediately wipe dry to prevent flash rusting!
Pay particular attention to welds. Welds are often the first areas on a frame to start rusting if they weren’t properly prepped at the factory.
If you’re painting bare metal, you should apply an acid-etching primer to the bare metal.
If 90 percent of the paint is still in good shape, you might not need to do anything more than scuff it up with a power sander and 180- to 300-grit sandpaper. Scuffing the paint will promote adhesion.
5. Start Painting!
Now the fun begins! Apply your chosen topcoat to the cleaned, primed surface. Work in thin, even coats. Give adequate time to dry.
Follow the manufacturer’s instructions! You can’t cheat chemistry. If the instructions say to wait 8 hours but no more than 24 hours, you do that, d*mmit!
Stay Away from Aerosol Cans!
Don’t use a rattle can for anything except touch-up and hard-to-reach spots. The coats look good, but they’re super thin. And you can’t overspray a coat without trapping solvents and creating runs. You need at least 5-6 coats for decent coverage.
Apply a Primer Coat
Even combination paints+primers will normally benefit from a dedicated primer coat.
- If you used POR-15, you should use a POR-15 recommended topcoat, such as their enamel Top Coat or 2K Urethane products.
- If you sanded down to bare metal, you might use a DTM (direct-to-metal) 2k epoxy primer like Eastwood Epoxy Primer and catalyst.
- If you’re short on cash but still want to do the job right, you might use good ol’ Rust-Oleum Rusty Metal or Clean Metal primer.
Finish with the Top Coat
Most primers and rust converters aren’t UV-resistant, so they need to be protected by a topcoat.
Option 1: Farm and Tractor Paint
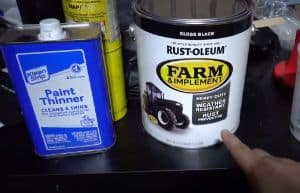
If you’re a good-enough-is-perfect type of person, you can’t go wrong with tractor paint! Get some Rustoleum Farm and Implement or Valspar Tractor and Implement paint. This stuff is relatively cheap, thick, durable, and goes on smoothly. For the price, it seriously can’t be beat.
If you can’t pick up tractor paint at your local Tractor Supply or Orschelen’s, you can also get by with a general-purpose metal topcoat Rust-Oleum Professional Grade Protective Metal Enamel.
Option 2: Top-Tier Topcoats
But if you’re a perfect-is-good-enough type of person – well, then honestly, I recommend taking your RV to a professional painter. Most top-dollar topcoats are designed to be catalyzed with a hardener and then applied with a spray gun and HVLP system. Not something most people have in their garage!
With that said, there are several high-quality, industrial-grade topcoats available to the homeowner, such as POR-15 2k Urethane or Eastwood Extreme Chassis.
There are many other topcoats on the market. I’m not a professional painter myself, so feel free to contact your local PPG or Sherwin Williams rep and see what they recommend!
With that said, please remember this is an RV, not an offshore oil derrick. Don’t over-complicate things! There’s no sense in painting a Jayco Jay Feather so the chassis lasts for 75 years – nothing else will!
So, that’s how you paint an RV frame.
If it sounds like a lot of work, it is. That’s why I recommend undercoating your RV before rust ever has a chance to rear its ugly head. Or at least apply a seasonal rust inhibitor like Fluid Film.
“Out of sight, out of mind” is terrible advice for maintaining an RV frame. To keep your chassis frame in tip-top condition, you need to annually inspect and repair any signs of rusting. Otherwise, you’ll be back at this article again, wire brush in hand.
Leave a Reply