Let’s take a break from our regularly scheduled RV programming and look at their close cousin, the utility trailer! (Although a lot of this advice does apply to RVs as well. It’s just harder to wire an RV because of the underbelly.)
Wiring a small trailer is no easy feat. Even wiring (correctly) a simple 4-way trailer wiring harness requires several hours of labor. The last thing you want is for Mother Nature to undo all your hard work. So what’s the best way to protect your trailer wiring for the long haul (no pun intended)?
Why Does Trailer Wiring Need to Be Protected?
Trailer wiring is exposed to the elements 24/7. It requires protection from the following dangers:
- UV exposure (harsh sunlight)
- Chemicals (from road grime)
- Moisture (from rain and condensation)
- Mice (and sometimes wasps)
- Abrasion (such as road rash)
Damaged wiring causes many common headaches, such as lights and brakes that won’t work. It’s the bane of trailer ownership. Invest in your wiring now, and you’ll reap the rewards for years.
Is OE Wiring Good Enough?
Unfortunately, the typical wire harness installation on a commercial utility trailer leaves a lot to be desired. Here are some signs of mediocre quality.
Problem: No Dedicated Ground Wire
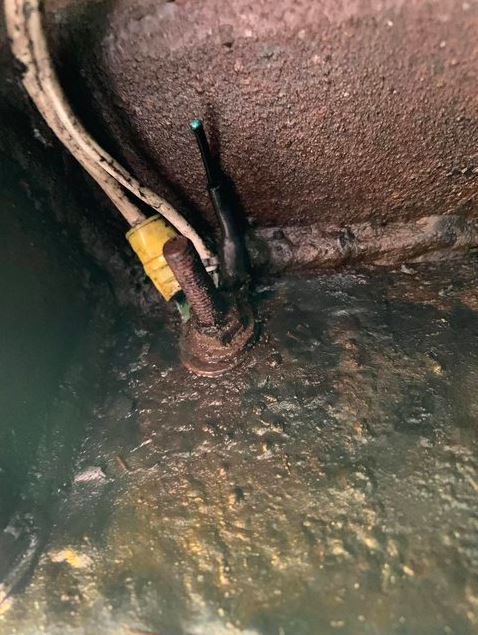
Unfortunately, many commercial trailers still use the trailer frame as the common ground. A pigtail from each light or brake is screwed to the frame, usually with a star washer to scrape away the paint for a good connection. In some cases, such as sealed tail lights with mounting studs, the stud itself is the ground connection.
Unfortunately, these connections are known to fail – and fail often. The terminal corrodes; the screw or nut vibrates loose; rust builds up beneath the star washer.
If you’re replacing one of these screw ground connections, use a heat-shrink ¼” ring terminal and a ¼” stainless steel hex-head self-drill screw. Clean the base frame metal with a wire brush and coat the entire connection with dielectric silicone grease.
Better yet, run a separate ground wire to each light and brake! By far, this is the best solution.
Problem: Unprotected Trailer Wire & Cable
Most trailer wire cable is made of GPT wire, a low-voltage automotive primary wire. It’s really not the best choice for extended outdoor exposure. It’s not tinned like marine primary wire, it doesn’t have the wall thickness of HDT wire, and it doesn’t have the wear resistance of THWN-2 wire. If you’re building your own wire harness, consider using tinned copper marine primary wire.
Regardless of the type of wire you choose, it’s cheap insurance to protect the cable inside of metal tubing, loom, PVC conduit, or within the frame itself. Plastic split loom is the easiest and fastest method, but severe-use trailers may benefit from rigid or flexible non-metallic PVC conduit rated for exterior above-ground use.
Hint: If you use plastic split loom, you should wrap each tee or cross junction with harness tape for continuous protection.
If you choose not to protect your cable inside conduit, at least replace the chintzy frame clips with nylon-coated loom clamps, also called P-clamps (where the cable runs alongside the frame) and plastic or rubber grommets (where the cable runs through the frame).
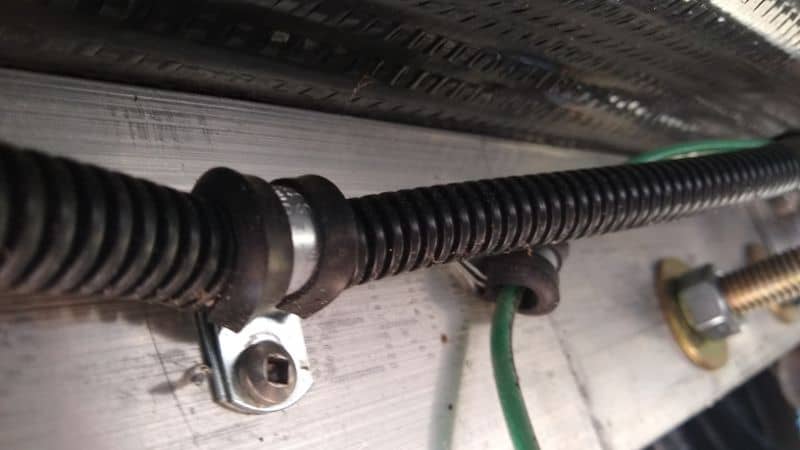
Avoid long, unsupported spans. When copper wire moves, it gets brittle. Support the cable at least every 18 inches. While loom or conduit clamps are best, some prefer zip ties and zie-tie mounts.
NEVER kink wire and run it along a sharp edge!
Hint: Don’t trust the adhesive-backed zip-tie mounts. Use the ones with a screw hole in the center, and reinforce the glue with a screw!
Problem: Uninsulated Wire Terminals and Splices
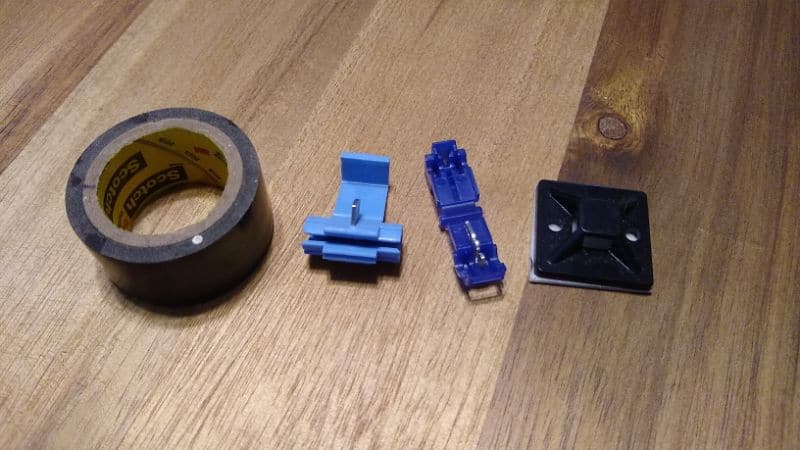
Every tap and connection in a wire harness is a potential failure point. Unfortunately, many trailers come with connectors better suited for interior use, like wire nuts, blue Scotchlock 804’s, and vinyl-insulated butt crimp connectors.
There are far better options out there – even without soldering.
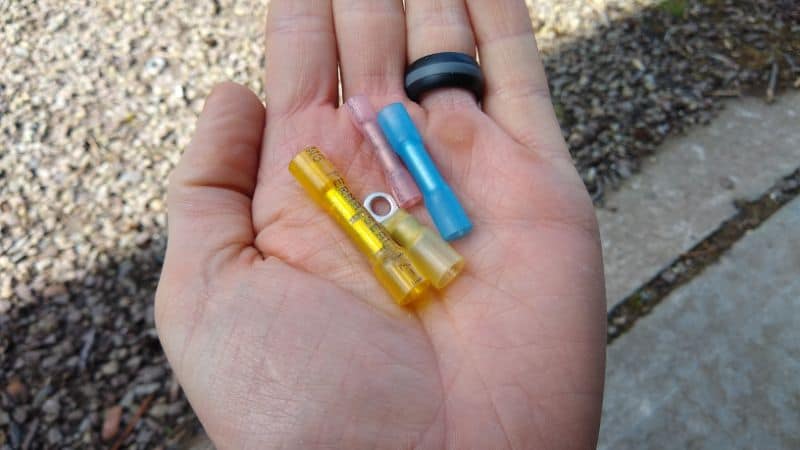
- For butt connections and ring terminals, use heat-shrink connectors. These wire connectors shrink, ooze and seal with a heat gun, creating a permanent, watertight seal. You can also purchase the heat-shrink sleeves separately and cut to length for your application.
- For pigtail connections, use gel-filled IDC connectors like the 3M Scotchlok 314 pigtail connector. If you prefer Wago connectors, use one of their gel-filled cases.
- Wire taps on bonded cable can be difficult to seal, especially when using conduit. One option is a belt n’ suspenders approach: Use a gel-filled quick splice for the tap, and then wrap the connection in electrical tape.
- In an emergency, you can squirt dielectric silicone grease into a wire nut, tap, or lever nut for a semi-watertight connection. This is a common quick n’ dirty improvement made to many boat trailers.
Hint: You need to choose whether to wrap wire splices into your harness or make them in a separate junction box. If you wrap the splices, soldering is best, but you can use crimp connectors like quick splices and T-taps. If you prefer a separate junction box, you can use quick splices, wire nuts, lever nuts, but make sure you use exterior-rated junction boxes, not just steel handy boxes.
Lastly, don’t skimp on the crimp! Don’t mash Scotchlocks with pliers or use an all-in-one wire tool to crimp butt splices. Use high-quality tools designed for the job.
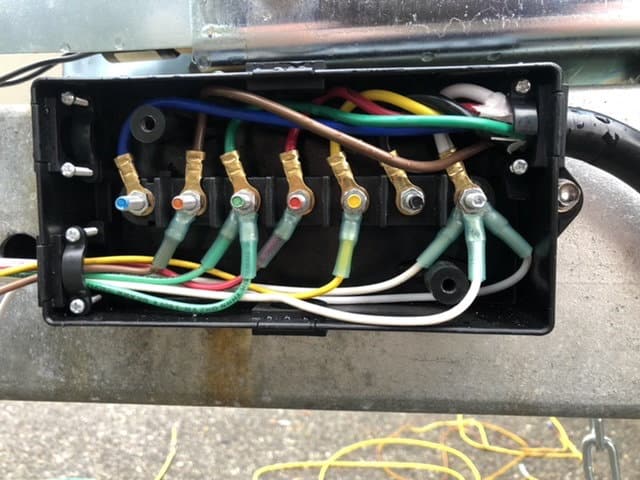
Problem: No Junction Box
Cheap trailer wire harnesses have no junction box. Instead, they run a bonded cable directly from the plug to the tail lights. Taps for marker lights and other loads are made along the way.
While there’s nothing technically wrong with this system, a junction box between the trailer plug and the loads is a significant improvement.
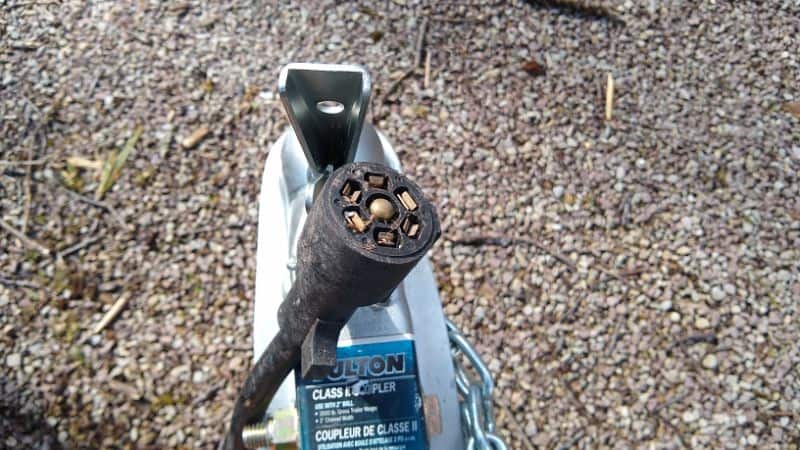
First, you can replace the trailer plug separately. This allows you to purchase higher-quality plugs (also known as “umbilical cords”), such as molded trailer plugs. By using a molded trailer plug, you can incorporate a strain relief clamp to protect the wiring. Better yet, invest in a harness plug protector like the Connect2Protect.
Second, troubleshooting the system is a breeze with a junction box. With a multimeter, you can easily pinpoint voltage drops, shorts, or other electrical problems.
Third, adding circuits is easy. You can convert to a homerun system. You can add an auxiliary charging line for your trailer battery. You can upgrade from a 4-way to a 7-way system. You can add a brake line for an additional axle.
Leave a Reply