It’s your first time. You can feel your heart thudding against your chest. You look around, double-checking everything has been set up correctly. You’ve never done this before. You’ve never connected like this. After this weekend, will life ever be the same?
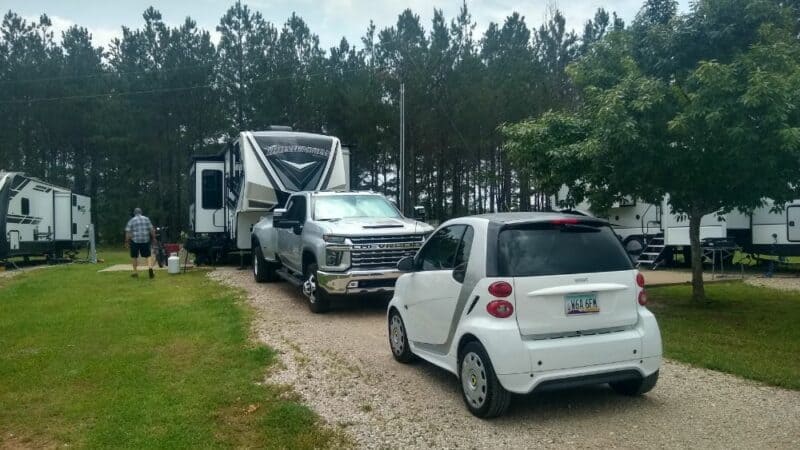
Hey, no, I’m not talking about that! I’m talking about the first time towing your RV (particularly your travel trailer!).
The first time towing your RV camper can be stressful. You really do want everything to go off “without a hitch.” After all, the only difference between a 5,000-lb trailer and 5,000-lb battering ram careening down the Interstate is that one is properly coupled.
This article is about one thing only: coupling a travel trailer to your tow vehicle.
- If you’re new to towing an RV, this is for you.
- If you’ve never towed before at all, this is for you.
- If you’re not sure what to purchase to tow your RV, this is for you.
This article IS NOT about pintle hitches, articulating hitches, gooseneck hitches or 5th wheel hitches. It only covers simple ball and RV weight-distribution hitches for travel trailers.
Basics of Hitching Up Your RV
You might be already familiar with how to hitch up a towable camper. If not, here’s a quick refresher.
This list was inspired by a simpler 10-step process from Curt Manufacturing. To see the process with pictures, check out their 10-step towing tutorial.
Step-by-Step Guide to Hitching Up Your RV
1. Either Find a Friend or Use a Backup Camera
Backing up is difficult to do solo. You’ll be hopping in and out of your car a dozen times! Many hands and eyes make for light work.
2. Align the Vehicles
Position your tow vehicle some ways in front of the camper. The two should be aligned so you don’t have to zig-zag into position. Ensure you can see clearly out of your mirrors.
3. Reverse Your Tow Vehicle
Go slow! Don’t punch the gas. Let the engine’s own momentum drive the vehicle backwards. Keep your feet on the brake pedal and one hand on the wheel. Follow your friend’s instructions, and don’t oversteer! Avoid jackknifing. If you get tangled up, take a deep breath, drive forwards to reset, and start over.
Again, if you need some helpful hints about backing up, here’s another helpful article from Curt.
4. Raise the Trailer Tongue
Once you’re about 18 inches from the trailer coupler, park the tow vehicle. Use the tongue jack to raise the height of the coupler so it’s 1-2 inches higher than the trailer ball. I recommend using a jack block at least six inches in diameter underneath the jack foot to prevent the foot from sinking into soft ground.
5. Align the Trailer Ball with the Coupler
Slowly reverse the tow vehicle and align the coupler on top of the trailer ball. It doesn’t have to be perfect. You can usually tug on the trailer ball or coupler so one shifts an inch or two.
6. Couple the Trailer
Ensure the coupler is unlatched and in the open position. Now, lower the coupler onto the trailer ball using the tongue jack. The pocket of the coupler should nest over the trailer ball. You’ll often hear a dull “clunk” when the two are fully engaged. If you’re having trouble, try some trailer ball grease or use the “assistance” of a rubber-headed mallet. Couplers can be stubborn!
7. Latch the Coupler with a Safety Pin
Test the connection by slightly jacking up the trailer so ensure the ball is fully engaged with the coupler.
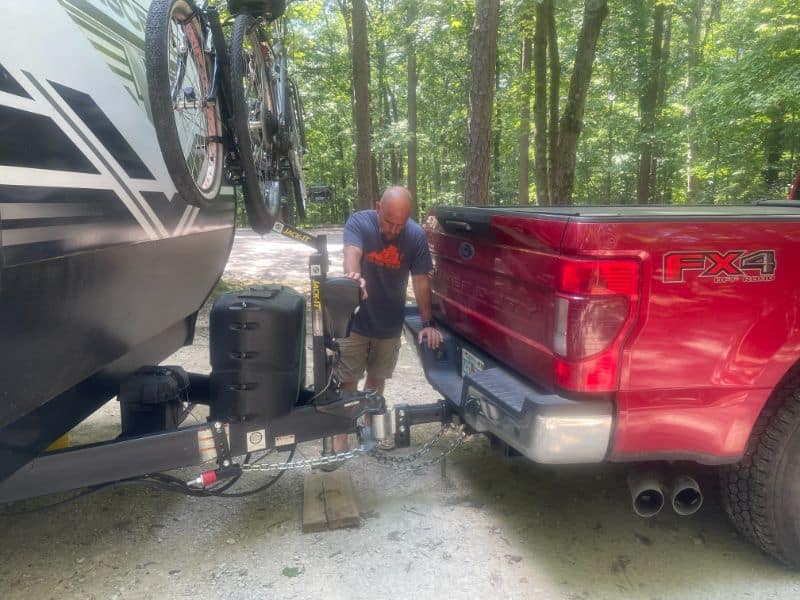
7a. WDH: Attach Weight-Distribution Bars
If you’re using a weight-distribution hitch (highly recommended for most RVs), you’ll need to attach the weight distribution or sway bars at this point. Insert one bar end into the hitch and the other into the tongue bracket. Fasten as per the manufacturer’s recommendation. You may need to raise the tongue jack or use a “helper bar” in order to get both ends inserted.
For more details on how to hook up an RV weight-distribution hitch, check out this YouTube video from Haylett RV.
8. Attach the Safety Chains
The connection should be in a criss-cross pattern to the hooks or eyelets on the tow vehicle hitch. The safety chains should form a cradle of sorts and should not drag on the ground (that’s a fire hazard!). They should be long enough to allow the camper to fully rotate relative to the tow vehicle but no more
9. Plug in the Trailer Wiring
You’ll likely have a round 7-way blade connector sometimes known by its eponym, “the Bargman.” The trailer connector usually plugs into a socket on the tow vehicle bumper. If you have a 4-way flat connector (small campers only), then you may have a wire harness coming out from somewhere in your trunk.
10. Test the Trailer Lights
Check the turn signals, brake lights, marker lights, hazards and reverse, if equipped.
11. Attach Breakaway Cable
Your towable RV comes with a breakaway switch that will activate if your towable camper becomes disconnected from the tow vehicle. When connected, this switch allows power from your RV house batteries to energize the electric brakes to bring your camper to a halt. You need to attach this breakaway cable to an eyelet or connection point on your tow vehicle hitch.
12. Stow the Tongue Jack
Raise or flip the tongue jack into its travel position. This may require removing the castor wheel or jack foot. As you raise the tongue jack, all the weight of the hitch will be transferred onto the trailer tongue and tow vehicle. You’ll see some settling. This is normal.
13. Inspect for Level
Once the tongue jack is raised, step back and look at your setup. Your camper should sit level without any nose dive. Your tow vehicle should also sit fairly level without severe rear end squat. If either are severely tilted (called the V Effect), then the trailer ball height may need to be adjusted. More often than not, heavier RVs require a weight-distribution hitch to achieve full leveling.
14. Double-Check Everything
Spend an extra 30 seconds double-checking the safety chains, the 7-way plug, the tongue jack position, etc. Walk around the camper and ensure all wheel chocks are removed and all stabilizer jacks are raised. Don’t drive away without ensuring your safety! You’re pulling something the size of an elephant at 65 mph down the interstate, for Pete’s sake!
The 5 Travel Trailer Coupling Components
Now that we know the basics of hitching up, let’s look at the components that make up the connection.
This information will help you purchase replacement parts or design your system from scratch. It will also teach you about some safety and performance upgrades.
There are five basic elements to a travel trailer coupling connection: a receiver hitch, ball mount, hitch pin, trailer ball, and a coupler.
1. Receiver Hitch
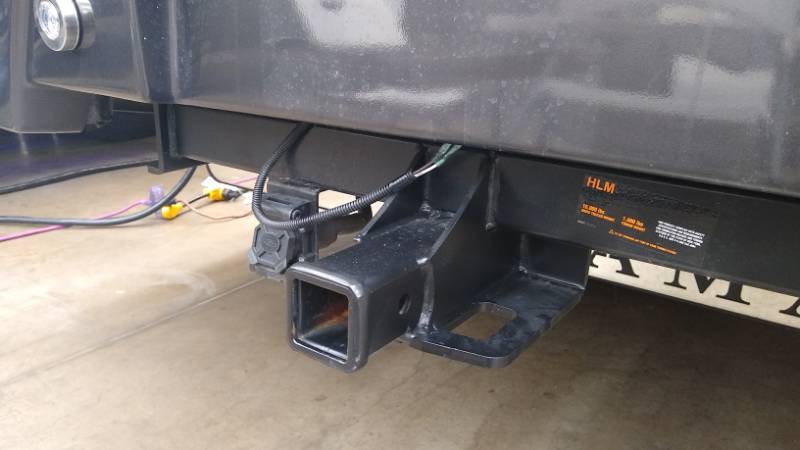
If you’re pulling a towable RV, your tow vehicle needs a hitch. These hitches are welded or bolted onto the vehicle frame.
Some trucks have “bumper-pull” hitches, where a trailer ball is mounted directly onto a truck step bumper. While convenient, bumper-bull pitches are usually only rated for 5,000 lbs towing and aren’t suitable for most RVs.
Many trucks and SUVs come directly from the automotive dealer or factory with hitches installed. If you need an aftermarket hitch, you can have one installed at U-Haul, your local auto dealership, Pep Boys, etc.
Hitches will come with a square, hollow receiver designed to accept a square tube shank. But not all hitches are created equal! They come in different receiver sizes with different weight class ratings.
Check out this Curt table for standard hitch configurations.
Most RVs can be towed with a Class 3 (8,000-10,000 lbs) or Class 4 (10,000 – 12,000 lbs) hitch, both of which use a 2×2” square receiver. If you have a Class 5 (20,000 lbs) hitch which uses a 2-½” x 2-½” square receiver, that will also work.
As a rule, you can use adapters so a larger (stronger) hitch can accommodate a smaller receiver shank, but not vice versa!
2. Ball Mount or Weight Distribution Hitch
Choosing the right ball mount can leave you scratching your head.
Why is one $20 and one $500?
A ball mount serves an important purpose: To level your camper when loaded and connect to your tow vehicle.
- A ball mount that is too high will lift the front of your trailer.
- This can cause “porpoising” when driving.
A ball mount that is too low will lower the front of your trailer in a nose-dive. This overloads the coupler connection and can severely stress or even damage the rear axle or frame of your tow vehicle.
The ideal trailer ball mount will keep your trailer level and prevent your tow vehicle from squatting.
Ball mounts come in three types:
1. Fixed
These are the simplest ball mounts, available at many local stores. Many fixed ball mounts have a drop or rise, commonly 2” or 4”. Some ball mounts are reversible and can be used as either a drop or a rise.
2. Adjustable
Adjustable ball mounts typically have slotted channels with solid locking pins that allow you to raise or lower your trailer ball to the proper height. Many adjustable ball mounts come with dual or triple integrated trailer balls (e.g. 2” and 2-5/16”).
3. Shock-Absorbing
For serious off-road applications, you can purchase a shock-absorbing ball mount hitch. These ball mounts typically use airbags or polyurethane bushings. They can help reduce trailer sway, quiet the noise and limit transferred stress.
What About a Weight-Distribution Hitch?
If you’re using a weight-distribution hitch, the ball mount will typically come as part of the assembly. The ball mounts are unique to the design, and many contain integrated sway-control features. Some have reversible shanks for a 2” drop or rise.
3. Hitch Pin
Ah, the humble hitch pin. This device locks the ball mount into the hitch receiver tube. It prevents the ball mount from pulling out.
You can get away with a simple ⅝-inch steel pin and clip.
In fact, that’s what the thieves want you to do!
Spend the extra $20 on a locking hitch pin. These are made by many manufacturers. Most are barbell-style pins, made of stainless steel, with pin or disc tumbler locks.
No pin is truly theft-proof, of course. A battery-powered angle grinder can defeat any of them. But that’s loud, conspicuous, and time-consuming. Plus, who carries around a battery-powered angle grinder with a cutting blade at all times?
4. Trailer Ball
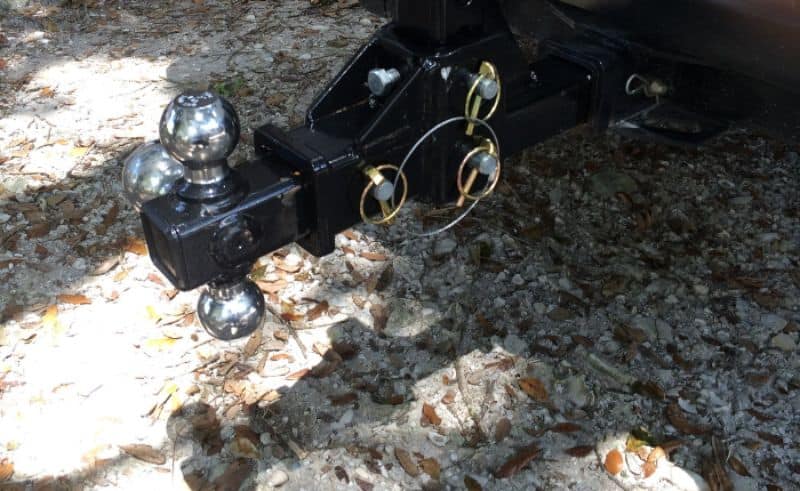
Choosing a trailer ball for your camper couldn’t be easier!
Choosing the Correct Ball Size
The trailer ball should be the right strength and the right size. There are four US standard sizes:
- 1 7/8 inches
- 2 inches (aka 50mm)
- 2 5/16 inches
- 3 inches (gooseneck only)
2” and 2-5/16” are the two most common sizes to tow an RV. Choose the ball size that matches the coupler on your camper.
You also choose a shank diameter and length. Common shank diameters are:
- 3/4″
- 1”
- 1-1/4″
The 1-1/4” shank size is the strongest and is required for heavier RVs. Lightweight trailers may get away with a 1” shank. Only the smallest trailers, like an ATV trailer, can get away with a 3/4″ ball shank size.
Ensure that your ball mount will accept the required shank size; do NOT use a shank that is too small! Follow the ball mount manufacturer’s instructions when selecting a trailer ball to ensure you’re using the correct shank diameter and correct shank length.
Can I Install a Trailer Ball Myself?
Unfortunately, most RVers will not be able to safely install a trailer ball and nut themselves.
While specifics may vary between manufacturers, as a rule:
- When tightening a nut on a trailer ball with a ¾-inch shank, use 150 lb-ft of torque.
- When tightening a nut on a trailer ball with a 1-inch shank, use 250 lb-ft of torque.
- When tightening a nut on a trailer ball with a 1-¼-inch shank, use 450 lb-ft of torque.
These are extremely high values! Most DIY torque wrenches don’t go above 150 lb-ft of torque. You’d have to ask a local mechanic shop or trailer service facility to loan you one, and by that point, why not just ask them to do it?
Some DIYers use a dedicated hitch ball double-ended wrench, usually 18-24 inches long, with 1-⅛ and 1-½-inch closed ends. Achieving a specific torque value, however, is nigh impossible. And unless you’ve been training for a powerlifting competition, you’ll never be able to achieve 450 lb-ft of torque.
Some trailer balls have a hexagonal base or 2-sided base for use with a large for use with oversized locking pliers or adjustable wrench. Again, most DIY tools are too small. Some trailer balls (usually the small ones) only have a round base, relying on nothing more than friction to hold them in place while tightening!
5. Coupler

A coupler is welded or bolted to the front of your trailer frame. It mates with the trailer ball for a secure swiveling connection.
Most travel trailers use an A-frame coupler welded to the chassis tongue rails. The typical coupler is made of stamped sheet metal steel, painted black, with a simple hand-operated latch.
The exact latch design varies by manufacturer. Common styles include:
- Trigger
- Yoke
- Wedge
Personally, I think the trigger latch works best. I often have to use a dead blow hammer or rubber mallet to get a yoke latch to properly seat.
Anyways, the common A-frame coupler gets the job done. It’s not a complicated piece of equipment. Always have a mallet and some trailer grease handy.
And ALWAYS use a safety pin with your coupler! Virtually all couplers will “lock” the latch in place using some sort of pin. This is an extra level of security.
Allowed Range of Motion
What you should know is that while a simple A-frame coupler will allow your trailer to easily swivel side to side, it only allows so much vertical movement. Typically, a coupler will bind if vertical movement (up and down) exceeds 15 degrees or so.
This is not a problem for 99% of RVers. But if you have a 4×4 camper and plan to tackle rough, curvy, steep roads, you might want to consider an alternative design.
Alternative Coupler Designs
Small cargo trailers might use a shock-absorbing coupler. Larger RVs might use a multi-axis articulating coupler like the Lock n’ Roll or even a pintle hitch, a common and reliable design used on military vehicles.
The only other type of coupler I would call to your attention is known as a Bulldog or collar-lok coupler. This coupler style is extremely durable, reliable, and darn near impossible to kill. They have better holding power than traditional A-frame couplers, and they also release more easily under load. You won’t find them on many stock RVs, but it’s an easy upgrade with your local trailer service shop.
Leave a Reply