I certainly don’t know of every subfloor on the market. But I’ve used, seen or researched quite a few. I feel confident saying that 95% of the RVs in the country use one of the following types of subfloors. Most either use seamless OSB subflooring or an insulated, framed floor with 5/8″ tongue-and-groove decking.
TYPES OF RV SOLID FLOORS
Ol’ Standby: 4×8 Plywood Sheets
In ye olden times, RV floors were made from 4×8 sheets of plywood. This size of sheet – four feet wide, eight feet long – is the standard size for a construction sheet good in the U.S. construction industry. These sheets were commonly laid side by side – not end to end – along the length of an RV.
Many manufacturers still use 4×8 sheets to build RV floors. It’s time-consuming compared to a single jumbo-sized piece of flooring, but it’s a popular pick for stick n’ travel trailers with insulated subfloors (more on that later).
You don’t normally see 4×8 subflooring laid directly on the chassis frame. All those seams are just leaks waiting to happen!
Construction-grade plywood can be a challenging material to work with.
- It bows and warps after fabrication.
- Its size changes with humidity.
- The layers can separate in a failure called delamination.
- Voids inside the plywood can trap moisture, calling the plywood to rot from the inside out.
Premium-grade plywood has very few of these issues, but it is prohibitively expensive (easily over $100 per 4×8 sheet!).
Ol’ Faithful: The Rise of OSB Subfloors
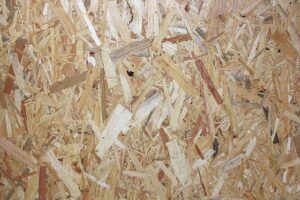
Oriented-strand board (OSB) was born in the 1970s. OSB is a type of manufactured wooden sheet made from layers of wood chips bonded with glue. Unlike plywood, it was truly flat. And it was cheap. Really cheap.
Unfortunately, early versions of OSB were prone to rotting and disintegrating. In fact, your Grandpa still probably doesn’t trust OSB.
But the truth is that OSB manufacturing has improved 10x, while the quality of lumber has decreased by the same. OSB is now the manufactured wooden sheet good of choice, and it shows no signs of slowing down.
What Makes OSB the Most Popular Subfloor Choice?
Whereas plywood suffers from warping and voids, OSB is consistent. Engineers can specify the strength axis, the exact thickness, the density, etc. Because OSB lays flat, it is easier to route and machine.
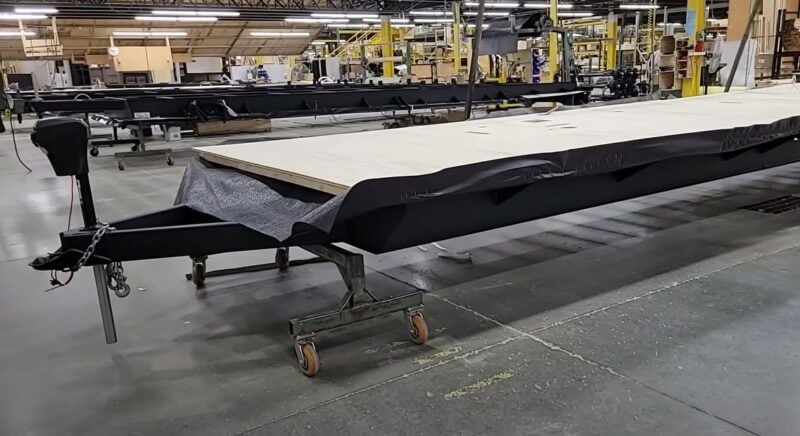
And here’s another reason: The size and thickness of OSB floors are only limited by the size of the machines. With plywood, sheet size is limited by the size of the tree!
Today, OSB sheets are easily available in sheets as large as 8×40-ft! This means most RV manufacturers can use a single “Jumbo” OSB sheet as a seamless subfloor in their RVs.
For all these reasons, a solid “jumbo-sized” OSB subfloor remains a popular subfloor in many RVs. Don’t trust all the hype, though: There’s no such thing as “marine-grade” OSB!
Not all OSB Is Created Equal
Don’t judge all OSB by the flaky stuff peeling apart in your grandparent’s basement. Cheap commodity OSB used for basic sheathing doesn’t even begin to compare to advanced OSB products.
Most OSB subfloor products have sealed edges – edges coated with waterproofing resin – and a waterproofed underside. Huber Woods Performax 500, for instance, has a thermally-fused waterproofing coating bonded to the bottom.
Leading products include:
- Huber Woods AdvanTech/Performax 500
- Tolko T-Strand PRO
- Georgia-Pacific DryMax
What Kills OSB?
What kills OSB is repeated wetting and drying. Even treated OSB, which can survive immersion in water, cannot survive repeated wetting and drying cycles. The chips will swell and then slowly disintegrate. In extreme cases, the RV owner might not notice the issue until they fall right through the floor!
TYPES OF RV FRAMED FLOORS
Insulated Framed Floors
Plywood and OSB floors are both examples of solid subfloors. There is another type of floor, a farmed floor, which isn’t solid.
Imagine a wall in your house. It’s framed with stick lumber – studs, plates, cripples and so forth – and sheathed on both sides.
Now lay that wall on the floor. That’s basically an RV framed floor. Only unlike a wall, which is framed with 2×4 lumber, RV floors are usually framed with 2×2 lumber to save weight and reduce overall height.
The thickness of the floor decking will vary as well, from ⅜” to ¾” depending on the joist spacing, desired quality, etc. It’s usually 5/8″ tongue-and-groove subflooring panels, either plywood or OSB.
This construction style creates hollow joist bays, which are typically insulated with fiberglass insulation (not my pick, but that’s status quo). It’s one of the most common construction styles.
It’s also common to route wiring and sometimes plumbing or piping through framed floors.
Check out the Grand Design Transcend floor.
Now, this sort of floor has a more robust style of construction. It’s also easier to build and easier to repair.
The big downside to this floor is the choice of insulation. 9 times out of 10, the RV manufacturer choose loose-fill fiberglass, which IMHO does not belong anywhere in an RV. Fiberglass easily molds, and it loses all its R-value when wet.
TYPES OF RV COMPOSITE FLOORS
I <3 composite floors. They are the coolest!
But the term “composite” has been loosely stuck onto many different types of floors. So it’s kinda confusing. So I have broken down composite floors into three categories:
- Laminated Composites
- Fused Composites
- Solid Composites
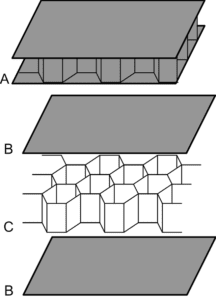
The first two categories – laminated and fused floors – are types of sandwich construction. All sandwich floors have (at least) a core inside of two skins, like this:
So all sandwich floors have at least three layers: Side A skin, the core, and Side B skin. More advanced composites may have even more layers!
- In laminated floors, the layers are glued together. This is usually accomplished by rolling or spraying the adhesive onto the materials and then feeding them through a pinch roller or vacuum press to apply pressure to the bondline.
- In fused floors, the layers are melted together. This can be accomplished through thermal fusion (i.e., heat) or chemical fusion (i.e., solvent-welded).
I’m not going to get into the mechanics and physics of sandwich construction. They can get rather complicated. But here are the three main takeaways:
- Sandwich floors boast an incredible strength-to-weight ratio. They are often half the weight of plywood but twice as strong!
- The skins do most of the work.
- Sandwich panels excel at distributed loads. Where they usually fail is point loads: face screws, high impact, etc.
Composite subfloors are being adopted by premium RV manufacturers. It’s only a matter of time until they become an industry standard. RV consumers are just too sick and tired of dealing with rotten subfloors! It’s high time for a change.
LAMINATED COMPOSITE FLOORS
The RV industry originally attempted composite floors by simply gluing cheap 1/4″ plywood skins to Styrofoam cores. Those …. bombed. Badly. They came with all the problems of a wooden floor (rotting, bowing) plus the problems of a laminated floor (delamination)! And the solution is usually … replace the whole thing.
A lot of manufacturers fell hard on their own swords: Keystone, Jayco, Forest River, etc. Lots of reports of soft, squishy floors and catastrophic delamination. These floors were commonly used on travel trailers marked as “lightweight!’
The industry attempted some workarounds, such as inserting floor joists every 16, 24 or 32 inches into the foam core, and then screwing the face skins to those joists.
But those workarounds merely prolonged the inevitable. It was all too easy for water to wick between the lauan and the foam core and slowly rot the skins from the inside out.
A more modern version of a laminated composite floor is the Keystone HyperDeck floor, which the company debuted in 2020.
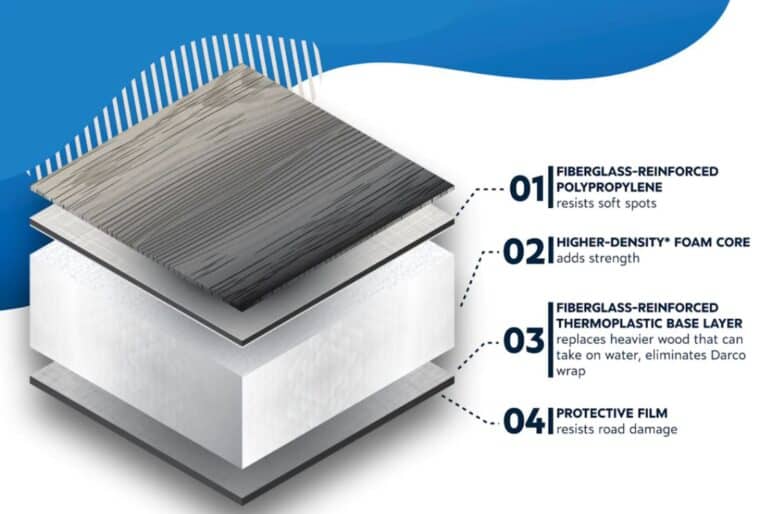
The HyperDeck substitutes fiberglass-reinforced polypropylene skins for lauan plywood (thank goodness!). No more mildew. No more rot. Far less likely chance of delamination.
Some laminated floors use sheets for the skins; others use roll materials. Roll materials are preferable. The resulting skin is seamless. Sheets lead to seams, which can
FUSED COMPOSITE FLOORS
TransCore
In 2020, Airstream announced it was moving away from 5/8-in OSB flooring in favor of TransCore composite flooring. According to RV News:
“The bonding method in creating this composite material means you don’t have the squeaking that can come with plywood pieces rubbing against each other, and it improves the longevity of the flooring,”
Airstream VP of Sales Justin Humphreys said:
“In addition to being slightly lighter than wood, it could potentially extend the life of your vinyl flooring – and the value of your trailer over time. With the addition of TransCore, the iconic Airstream shell is now completely free of any wood product.”
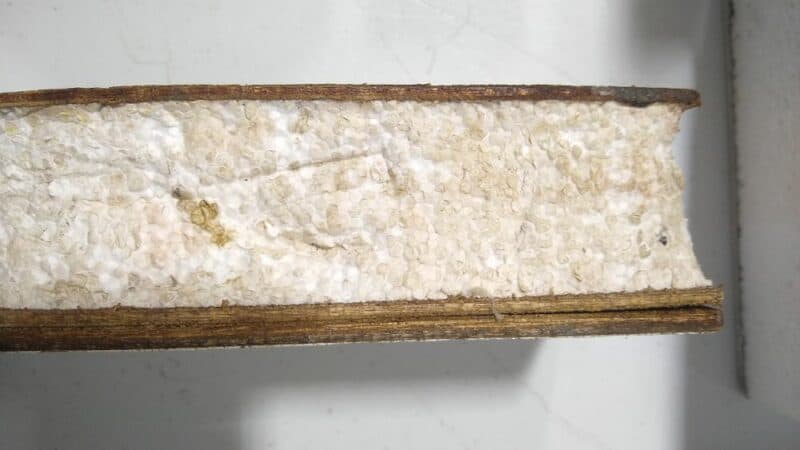
Here’s what TransCore looks like:
You can see typical sandwich construction: a lightweight foam core with structural fiberglass skins. The claim to fame here is fused fabrication. The skins and core are fed concurrently into a giant heated machine that heats the materials and presses them together. There’s no glue; the plastics fuse together.
Transonite
Transonite, made by Creative Pultrusions, is a unique offering in the composite subfloor space. Whereas most composite panels have cores made from high-density foam or honeycomb, Transonite pultrudes reinforced resin into a vertical matrix.
“We actually bring our glass and aluminum and resin into a die and the die is then heated,”
said Ted Harris, market development engineer for Creative Pultrusions.
“Polymerization takes place that creates a solid structural panel. It’s a 3-D composite panel. We actually stitch fibers and those fibers connect the top and bottom skins. They become saturated with resins and solidify and actually attach to the top and bottom skins to create what is essentially mini I-beams. We call those fiber inserts. We can vary the density of those I-beams from three up to 19 per square inch. Those fiber inserts create significant compressive strength within the panel.”
Yeah … it’s easier seen than explained. Here’s a picture.
The four big benefits here are:
- The pultrusion process creates a fused product; no bondlines to fail!
- Seamless core AND seamless skins! No leak points; no weak joints.
- Wide variety of skin thicknesses and strengths, from 0.55 to 0.250 inches thick.
- Wide variety of core thicknesses and strengths, from less than half an inch to four inches thick!
SOLID COMPOSITE FLOORS
When I say “solid,” what I really mean is homogeneous: the same material or matrix runs all the way through. In other words, the panel is not built with distinct layers.
This is a rare breed. Solid composite floors are eye-wateringly expensive. I don’t know of any mainstream RV manufacturer that uses solid composite panels for – well, just about anything. But you do see solid composite subfloors in turnkey construction, especially for off-road and amphibious RVs.
Most solid composite panels come from the marine industry. And most are made of Reinforced Polyurethane Foam (PRF), which is an extremely dense closed-cell foam reinforced with a fiberglass matrix. You’ll also hear it called structural foam.
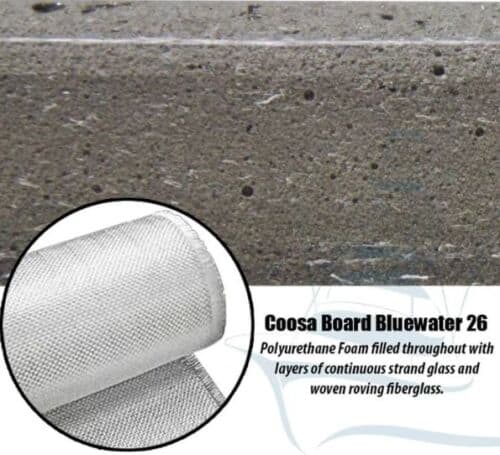
A popular pick is the Coosa Bluewater Series, from Coosa Composites. Coosa board is
“polyurethane foam filled throughout with layers of continuous strand fiberglass and woven roving fiberglass.”
There’s not much that can kill a structural foam board. They can be machined, adhered, and mechanically fastened. If you’re lucky enough to have structural foam inside your RV, count your lucky stars!
Leave a Reply