RV fiberglass delamination is the avada kedavra curse of the camping world. Once you see your beloved RV sidewalls start to bubble and pop, the end is nigh! –
– or is it? Does fiberglass delaminations spell certain death to your RV? Can it be fixed? What causes delamination in the first place?
Let’s talk through this insidious curse. Before we get into what causes fiberglass sidewall delamination, though, I’d like to briefly explain how RV laminated sidewalls are made. Otherwise, our glasses will fog up when we try to see the underlying causes.
How Are RV Fiberglass Sidewalls Made?
Laminated walls are the darling of the modern RV industry. Unlike a stick n’ tin wall, where siding and paneling are fastened to a stick-built wooden frame, laminated walls are a multi-layered sandwich held together by glue and faith. They are a composite structure.
What’s Inside a Laminated Sidewall
Laminated walls are straight, flat and incredibly strong for their weight. They are jumbo-sized panels (anywhere from 8 to 45+ feet in length) that can be quickly installed in a factory setting and easily revised for design changes. For those reasons, OEMs love them.
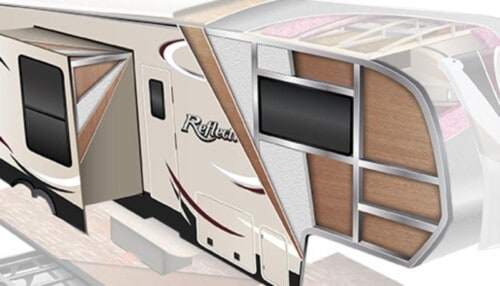
Layers of the wall include:
- Interior vinyl wallpaper
- Interior paneling substrate, usually lauan plywood
- Foam core (same layer*)
- Aluminum tubing (same layer*)
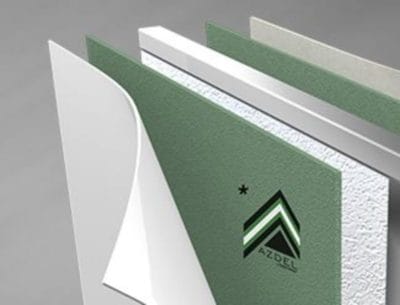
- Exterior fiberglass substrate, usually lauan plywood or Azdel
- Exterior gel-coated fiberglass (about 1/16” thick)
The core of the wall is EPS block foam (fancy word for styrofoam). A CNC router machines grooves and slots for wire chases and aluminum tubing. The aluminum tubing is either loose-laid into the grooves or is spot-welded in place. (In some cases, the wall is assembled in reverse order, with the foam press-fit inside the aluminum frame). The interior paneling and exterior fiberglass skins are then glued to the foam-and-aluminum core.
Check out this video (at 7:36) to see a rack of RV sidewalls sitting at the factory!
Why Is the Aluminum Framing There?
Speaking of the aluminum tubing, the interior and exterior “skins” actually bear most of the mechanical forces. The interior aluminum tubing is useful for screw retention and panel rigidity, not necessarily for load bearing. It’s not really a structural column in the way that residential stick-built framing is.
Fiberglass Requires a Substrate!
You should also understand that the exterior fiberglass itself is very thin, around 1/16 of an inch. The cheaper your RV, the thinner the fiberglass! It is packaged in large rolls, like giant-sized toilet paper. Since it is so thin, it needs a substrate to make it semi-rigid (so does the interior wallpaper, for that matter).
Generally, this substrate is either lauan plywood or Azdel composite. In some cases, such as around a curved surface, you may find fiberglass laminated to a heavy-duty, flexible, cardboard-esque substrate like Unicore.
>>> READ MORE: Insider’s Guide to Azdel, the Magic of Modern RVs
How Are the Walls Assembled?
Most laminated walls are fabricated using a pinch roller. First, the assembly line squeegees, rolls, or sprays adhesive between all the layers of a laminated wall. Then the full wall sandwich is fed through a roller with a gap ever so slightly smaller than the wall thickness. The layers compress, the glue sticks, and a finished wall comes out on the other side ready for machining.
A more expensive alternative is a vacuum press. The layers are assembled and the glue is applied inside a large enclosure or vacuum bag. Then the enclosure is sealed and all the air removed. At full vacuum (30” Hg perfect), 14.7 PSI is applied to the entire wall surface. The layers squeeze together, a bond forms, and the wall is ready for use once the glue cures.
What Is Fiberglass Sidewall Delamination?
Delamination is when some layer of the RV sidewall has become detached. It usually happens to the exterior skin in one of two places: Either the fiberglass delaminates from its substrate, or the fiberglass substrate delaminates from the core.
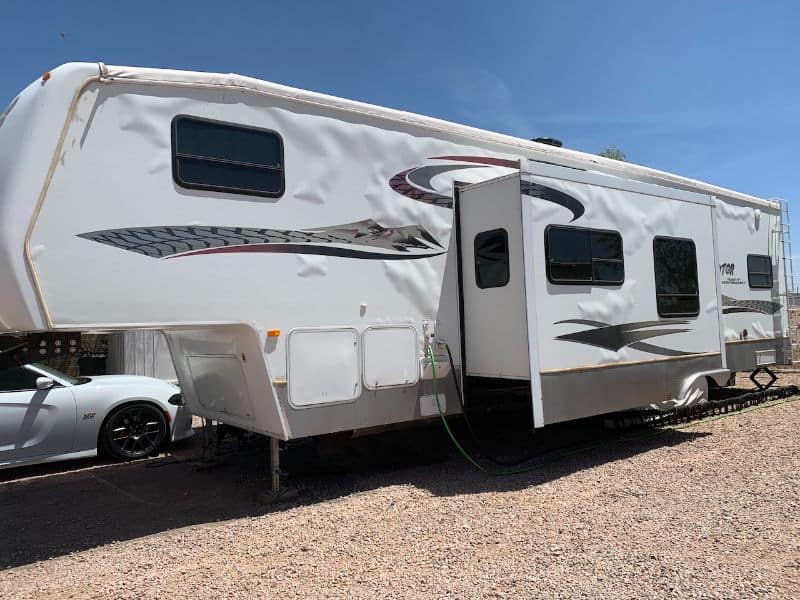
If you’re not sure what you’re looking for, it can be hard to spot sidewall delamination. Sidewalls are rarely perfectly flat. If you sight down them at an angle, you’ll see gentle bumps and curves. This is normal, especially with walls with giant holes for slide outs rooms.
However, bubbles, dimples, cracks, and sags are NOT normal. These are signs of delamination.
It’s also somewhat common to get small bumps or creases at the corners of entry doors, windows, slide-outs, and other fenestration. Is this a problem? Eh … usually not. However, if the wall has been squeezed too much, this can cause the fiberglass to crack, which certainly is a problem.
When you push on the sidewall, it should feel solid. It should not flex. If you push on a wall anywhere and feel a void or bubble, that’s delamination, and that’s a bad sign. The leak is not necessarily closest to the delamination bubble, although you should start with the closest feature and work outward and upward.
Some bubbles will go away when temperatures drop. Some will get worse when it’s humid. Because most delamination is caused by water damage to lauan plywood, the weather will always have a significant effect.
What Causes RV Fiberglass Delamination?
RV sidewall fiberglass delamination can be caused by five things:
- Moisture invasion
- Excessive heat
- Bending or flexing
- Hard impacts
- Defective manufacturing
1. Moisture Invasion: The Silent Killer
Water can damage RV sidewalls in several ways:
- It’s a powerful, persistent solvent that breaks down chemical bonds
- It often carries mineral salts, which create tremendous osmotic pressures
- It aids and abets the growth of mold
- It expands 9% when frozen, which can push layers apart
>>> READ MORE: Wood Vs Aluminum Framing in an RV: Which Is Best?
For all these reasons, water is about the worst thing that can happen to your RV sidewall. Typically, water invades a sidewall through leaks around windows, roof-edge trim, speaker hole cut-outs, and other penetrations. I’ve even seen where a city water inlet failed and dripped water directly inside of the wall!
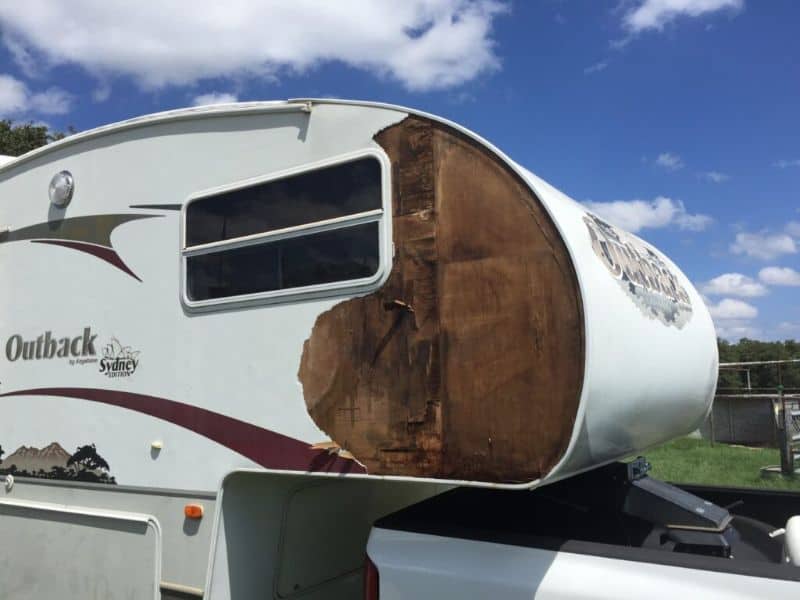
2. Excessive Heat: Big Bubbles
As you know, heat causes things to expand – but not everything expands at the same rate. When two layers are bonded together but one expands more than the other, this causes enormous internal stresses. Bonds can break and permanent bubbles can form.
Thankfully, the solutions are quite simple: Avoid dark colors on your RV sidewalls, and stay out of brutal, direct sunlight.
3. Mechanical Bending or Flexing: Pops!
This usually happens at the RV manufacturer’s factory, not after you’ve bought the camper. If an assembled wall isn’t handled properly, it can bend or sag, which causes internal stresses. These stresses can pop layers apart, which show up later as bubbles on the sidewall.
4. Hard Impacts: Hidden Voids
Occasionally, a rock can strike a sidewall hard enough to dent the foam core, but not hard enough to break the fiberglass. This dent leaves a void between the styrofoam core and the exterior substrate.
Voids are bad. They form pockets that can capture water. They concentrate stress. A bubble will form over the dent and slowly grow as the wall flexes with use. Here’s a hint: If you see spiderweb cracking over a bubble, that’s a potential sign that road damage caused the delamination.
5: Defective Manufacturing: Pimples and Dimples
If the glue doesn’t cure properly, or not enough glue is applied, or the pinch roller isn’t calibrated correctly, or a hundred other things, then the wall won’t be built properly. In particular, air bubbles can easily get trapped when using a pinch roller. Factory quality control is necessary to ensure that all walls are built to their specification.
Delamination was a huuuuuge problem when laminated walls were first introduced. Seemed like everyone and his mother had a delaminating camper. With modern RVs, the problem has been reduced, but it remains a thorn in the side of the industry.
Can I Fix a Delaminated Sidewall?
Restoring a delaminated wall to factory-like condition is actually pretty difficult. You will need the skills of an autobody repair shop.
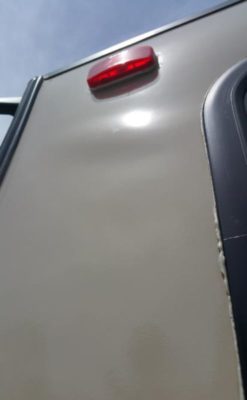
Small bubbles, less than the size of a dinner plate (like the above picture), can sometimes be restored with an RV delamination repair kit. They cost $75 – $250, on average. There are many kits on the market. They all work on the same premise: Inject an adhesive beneath the failed area, apply pressure, let cure, and then restore the gel coat.
If you’ve never worked with epoxy resin before, you’ll find the DIY repair kits to be a bit like your high school science fair project. You need gloves, mixing containers, syringes, injection tubing, etc.
Because epoxy resin immediately begins curing once mixed with a hardener, you can only work in small batches (read: small areas). So if you’re planning to restore an entire sidewall, you’re looking at weeks of work!
Plus, clamping the affected area can be challenging. You’ll need to apply force on the vertical walls. And no, a roller won’t do. You need sustained pressure for at least several hours, like ratcheting spreader bars or pipe clamps. You’ll probably need to park your RV next to a fixed structure, like a building wall or a tree.
And don’t even get me started on painting and refinishing. Restoring a gel coat finish is best left to boatbuilders, not DIY RV owners. If you’re willing to take on the challenge, you’re more a man than me!
Larger delamination repairs should always be left to the professionals, preferably someone skilled in collision repair bodywork. If the delamination cannot be feasibly repaired, there is no solution but to replace the entire wall. I’ll let you imagine just how much money that would cost!
Leave a Reply