A veritable encyclopedia of bad information has been published online about the humble RV furnace. If your RV furnace is not turning on, I highly advise you to take the Top 10 pages on Google and stuff ‘em in the digital trash can. For instance, I saw several articles that suggested “poor gas flow” could prevent an RV furnace from turning on, which is absolute hogwash.
I will share with you 7 things you can check if your furnace is not working – and by “not working,” I mean zero response. No blower fan, no ignition, nothing. Dead in the water.
This article is NOT comprehensive. Unless you know how to use a multimeter, there are some things you just can’t check. But before you call an RV repair technician (like me), cross these troubleshooting items off your list first.
1. Check the Panel Fuse
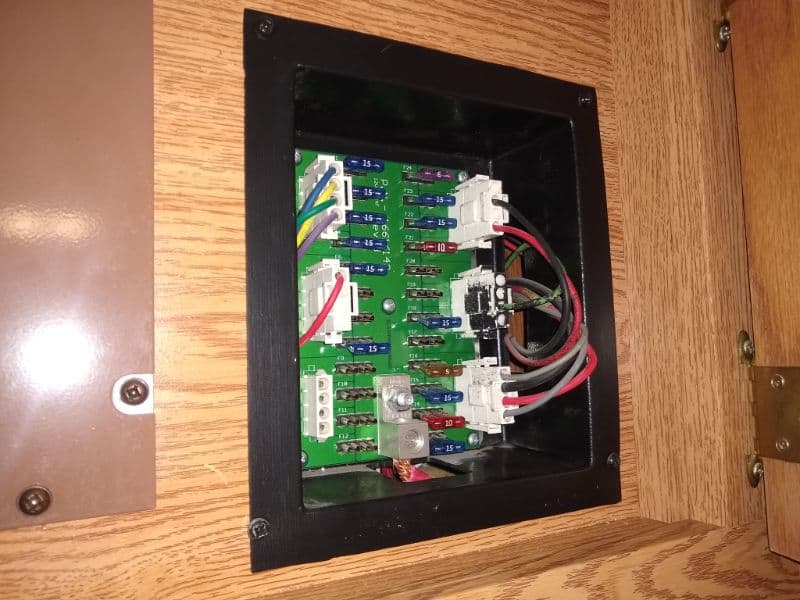
I know, I know. It’s super obvious. But I still see this overlooked in the field.
Don’t trust any LEDs on the fuse panel to tell you if a fuse is blown; don’t even trust your eyes when inspecting the fuse link! Fuses are sneaky. They can look good but fail under load. The ONLY way to know for 100% sure is to replace the fuse with a new one.
Psst … if you have a Park Model RV, your furnace may run off AC power, not DC. In this case, the furnace wiring is protected by a panelboard circuit breaker, not a DC fuse.
2. Double-Check the Thermostat Settings
Again, I know it’s obvious. But you need to double-check that your thermostat is on the correct Setting, Mode, and Temperature. If you can choose between Electric or Gas heat, choose Gas.
If you suspect a mechanical or electrical problem with the thermostat itself, you may be able to outsmart it. If your thermostat also controls your air conditioning, then turn on your air conditioner and run through its settings. If your air conditioner works, it’s unlikely the thermostat itself is broken.
If you’re still rockin’ an analog thermostat from the ‘90s, you should hear a “click” when the thermostat reaches its set temperature. If there’s no click, there’s probably something wrong.
3. Flip the Service Switch
Here’s an excerpt from an article I wrote for RVTravel.com:
“If you remove the exterior access cover (if your RV manufacturer was kind enough to provide you with one) from your RV gas-fired appliance, you may find an on/off rocker switch buried in the circuitry. It might look like this:
Here are a few quick things to know about these inline RV furnace switches:
- They are often found on furnaces and water heaters. For example, they are common on Dometic, Atwood, and Suburban LP furnaces and almost all tankless water heaters.
- They are mounted in different locations, sometimes inside the sheet metal shroud, and sometimes outside. If buried within, they can usually be spotted through the return air grate.
- In some furnaces, the toggle switch also doubles as an inline circuit breaker.
- Sometimes these switches shut off power to the appliance; sometimes they shut off power to the thermostat.
- Not all gas-fired appliances have these resettable switches. In my experience, the older the RV, the more rare they seem to be.
Usually, the rocker switch is a safety feature that allows me to shut off 12V power to the appliance or the master thermostat when I’m diagnosing and testing. Without 12V power, the control board can no longer “think,” and the appliance shuts down.”
Sometimes, this switch gets turned off or tripped. Try resetting it once or twice, which will clear any lock-out error codes as well.
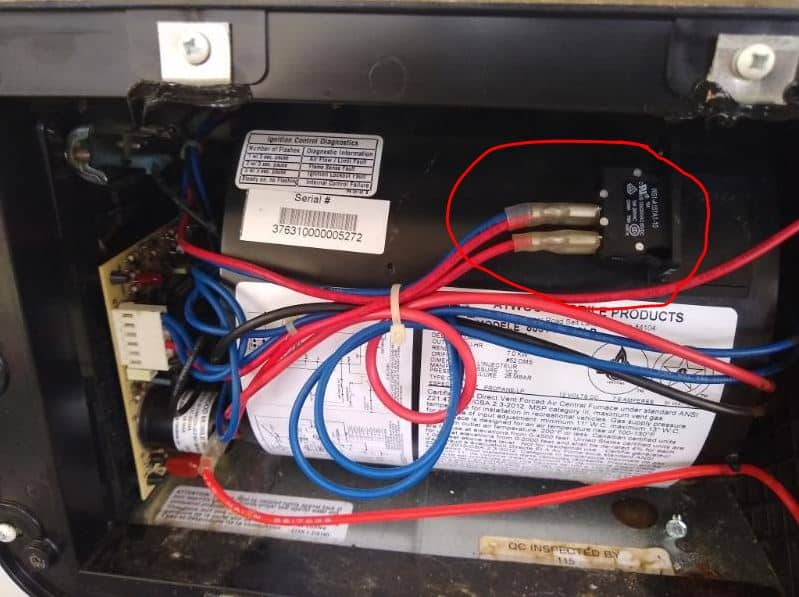
4. Tug on the Power Wire Connections
Notice I didn’t say “visually inspect” the wire connections. Tug on them! Make sure they’re gudentight. Check the wire connections at the furnace AND the thermostat.
Unfortunately, I can’t tell you everywhere you may need to inspect the wiring. Sometimes, furnaces are wired directly to their own thermostat. Other times, the air conditioners and furnaces share a thermostat, and still other times, the furnace is controlled by wires that run up to the air conditioner control box and back down to the thermostat. If any of those connections are loose or corroded, the furnace won’t turn on. So grab a flashlight, and start lookin’!
5. Inspect the Circuit Board
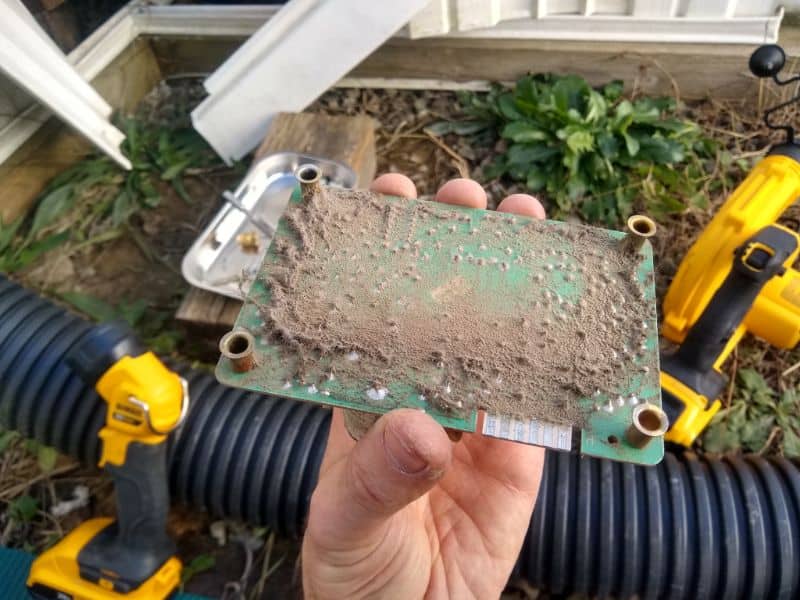
Ok, now it’s time to break into the furnace itself – well, if you can. This is where you should really consider calling a technician. If you’re lucky, your furnace has an exterior access cover that you can remove, play surgeon, and dig into the electrical innards. If you’re unlucky, you have no access cover, and your furnace must be uninstalled – which usually means breaking into the propane system. No bueno. Propane is dangerous, and you can die.
But if you can access your circuit board, look for a flashing LED, which indicates an error code. (Sadly, some really old furnaces don’t have error code LEDs.) If the furnace is not turning on and there’s no flashing LED, you may have a failing circuit board, often because of water damage. Unfortunately, without a multimeter, there’s not much more you can do at this point, and I don’t recommend installing a $200 circuit board “just because.”
6. Clean Off the Sail Switch

I already wrote a prospectus on the RV furnace sail switch, which you can read here. Long story short, if the sail switch has failed in the CLOSED electrical position, the circuit board will not allow the motor to turn on at all. It’s a safety hazard. Sometimes, a bad sail switch can be fixed with a good cleaning.
7. Listen for the Hum
In some cases, your furnace may be trying to turn on – but it physically can’t. Again, this is usually a case for a repair technician, but you might be able to glimpse a symptom or two. A motor that won’t spin freely, a motor that hums but doesn’t spin, or a broken/stuck fan blade are all symptoms of a severe mechanical failure.
One last word of advice: Don’t throw parts at the wall to see what sticks. I’ve been on service calls where the owner only calls me after spending $300 on parts – and the culprit was a $5 wire nut. If you’re stuck, call for help!
Leave a Reply