Unfortunately, RV roofs age less like fine wine, more like milk. Within 10-25 years, most RV roofs look like an abandoned petri dish experiment. But with full roof replacements commonly costing $150 to $400 per linear foot, is replacement always a feasible option?
If your RV roof looks uncomfortably similar to this …
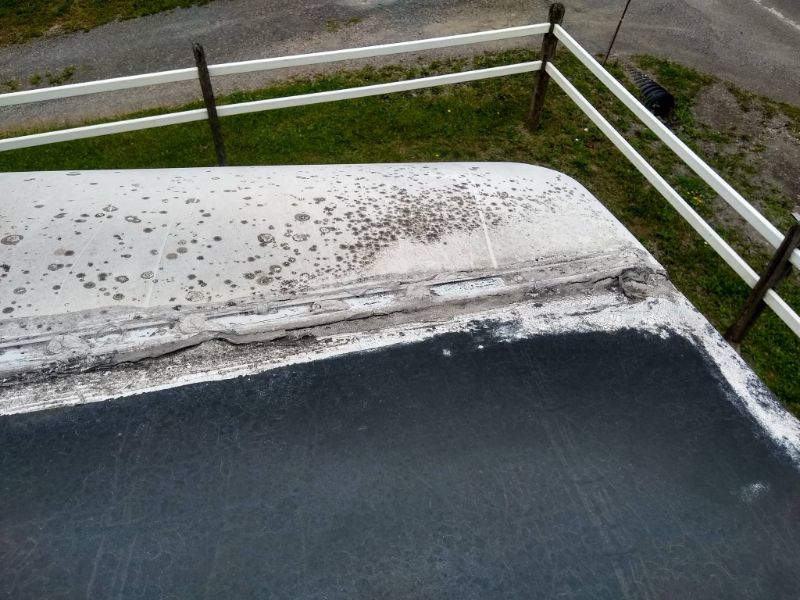
… then I want to tell you about your choices: reseal, recoating, refinishing – and yes, replacing!
What Is My Type of RV Roof?
I’ve discussed several types of RV roofing materials, such as in my post “The 6 Types of RV Roof Materials.” Here are the common top six:
- EPDM
- TPO
- PVC
- Fiberglass (sheet and roll)
- Aluminum coil
- Sheet metal (stamped)
The first three items are all membranes, meaning they are made of a thin, pliable sheet of material forming a continuous barrier (thanks, Merriam-Webster). Somewhat confusingly, both EPDM and TPO are types of rubbers; PVC is sometimes. But all three are gathered under the wing of “rubber roofs.”
When sold as a roll, these membranes are usually 20-45 mils thick (60 mils if you’re lucky), or about the thickness of a credit card. That’s a thin front line of defense against the water, sunlight and bug assault forces of the Great Outdoors!
TPO and PVC are both single-ply membranes, meaning they are manufactured in one layer. EPDM is usually a double-ply membrane, with a black lower layer and a bonded white upper layer for UV protection and solar reflection.
There are some significant differences in weight, maintenance, chemical compatibility, and UV performance between EPDM, TPO and PVC roofing membranes. But that’s not what this article is about. Instead, what do you do when your membrane is at the sunset of its life?
How Do I Know If My RV Roof Needs To Be Replaced?
If you’re a new RV owner, you may not know how to tell if your roof is in good condition! Here are some signs of an aging RV roof:
- Age between 10-25 years (less if stored outdoors, more if stored indoors).
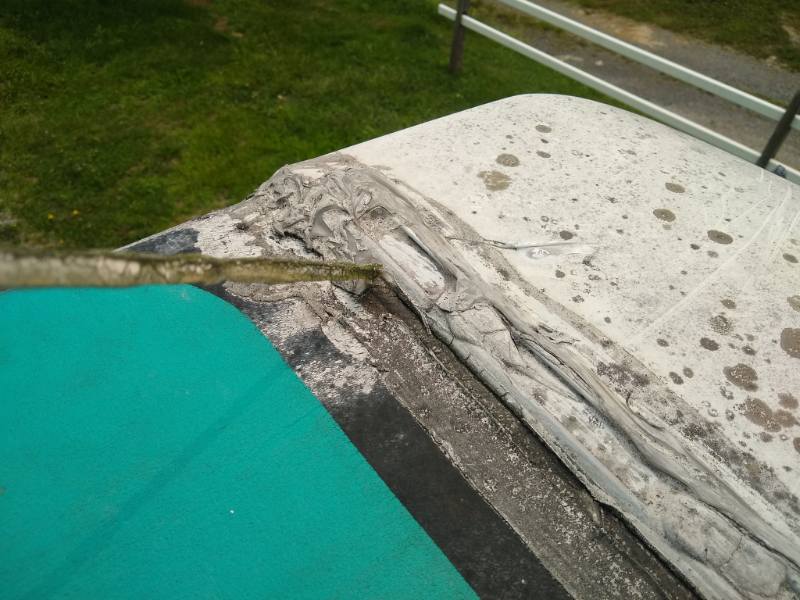
- Any cracks, tears, rips, flakes, abrasions, peels, etc.
- Any dimples or bubbles, usually indicating water damage or air filtration.
- Extensive growth of mold, algae, or fungus (check beneath air conditioner shrouds).
- Roofing patches, lots of roof repair tape, or caulking where it isn’t supposed to be.
- EPDM-only: Extensive chalking and streaking on your sidewalls.
- EPDM-only: Black or gray membrane showing below the flaking white upper layer.
If you’re seeing any of these signs, then you need to repair or replace your roof.
Option 1: Clean and Reseal!
Option 1 is as far as most people get. They notice their roof has a leak, they climb on top with a tube of silicone caulk they bought from Home Depot, they goop it over where they hope the roof leak was, and back down the ladder they go.
That’s not how you reseal an RV roof. You’ll probably spend several hours with a plastic chisel scraping away the old sealant, cleaning the area of any dirt or residue, and applying new self-leveling sealant ensuring it is compatible with the roofing material and prior sealant.
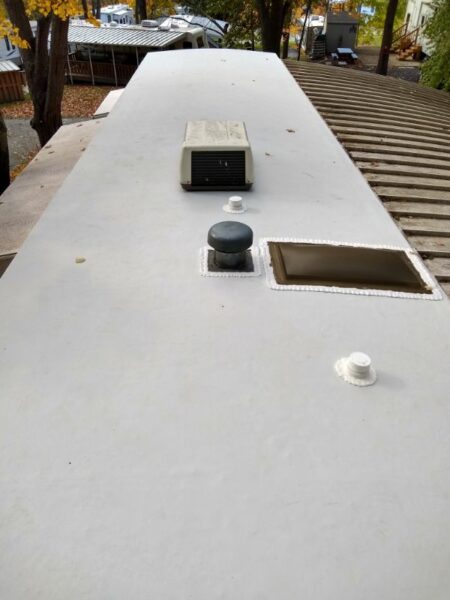
Before sealing the roof, you’ll need to clean it. Some people have used power washers with success (low pressure, min. 18” away from surface, at a slight angle), but do realize that you can easily cut through the membrane or force water underneath lap seams! I recommend using a garden hose sprayer, a soft-bristled brush with long handle, and the appropriate rinse-off roof cleaner for your membrane. You’ll also need to remove the air conditioner and refrigerator vent shrouds, plus any solar panels. It’s tough work, but it’s necessary every few years. Your roof doesn’t need to look brand spankin’ new, but it shouldn’t look like a Cretaceous-era swamp.
(If you have an EPDM roof, now is also the time you may want to finish off with a conditioner and UV protectant.)
Resealing does NOT extend the lifespan of your roof. But if your RV is hobbling on its last leg and you just need it to last 1-2 more seasons, maybe an afternoon’s clean-and-reseal is all that’s necessary. Here are some of my recommendations for caulks and sealants.
Option 2: Clean and Recoat!
RV roof recoating is big business. There are a lot of hats in the ring: Henry’s Tropi-Cool, LiquidRubber, Dicor Signature XL, RVRoofMagic, Heng’s, EverBond, CrazySeal, Rustoleum … there are acrylics, elastomerics, butyl rubbers, silicones, urethanes, everlasting gobstoppers .. some require primers, some require multiple coats, some are rain-ready in 15 minutes, some aren’t rain-ready for 2 days … oy vey!
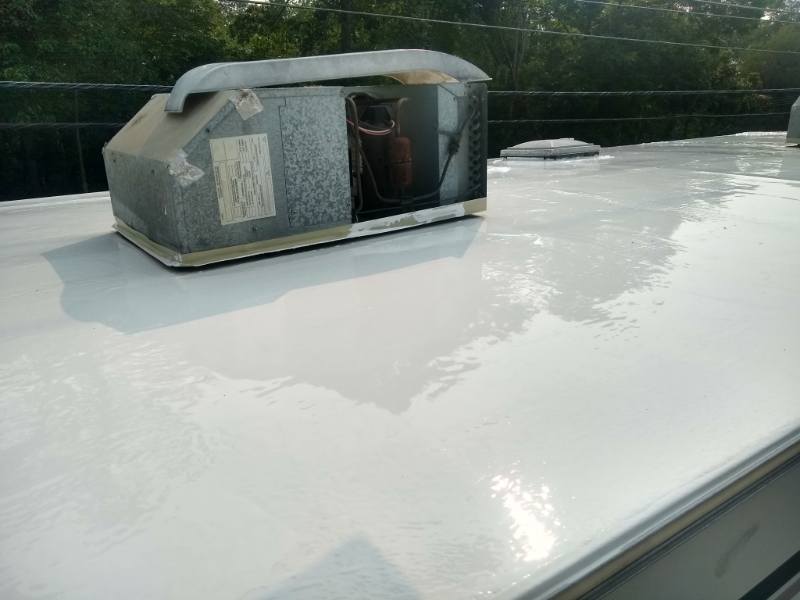
Most of these products are marketed as DIY solutions. (There are commercial RV roof coatings, but we’ll talk about those in the next section). Application details vary between the products, but most are rolled or brushed in 1-3 layers over a 1- to 2-day period.
In general, it’s not necessary to remove and reinstall any roof components to recoat your roof. You’ll just need to remove shrouds and covers to access as much of the roof as you can.
I have only used a few of these products, so I can’t really compare and contrast them. Instead, I would humbly share these nuggets of advice:
- Ignore the price. Compared to a new roof, all of these coatings are dirt cheap. You’ll spend days cleaning and prepping your roof; don’t negate your hard labor by trying to save a few bucks.
- Clean religiously. Like all paint jobs, the paint is only as good as the prep, so expect to spend 1-2 days just cleaning, prepping, and masking off your roof.
- Protect the membrane. You have no idea how fragile these membranes can be after years of outdoor exposure. Use cardboard or foam mats as floor protection. Don’t twist your feet in place. Don’t obsess over removing all the self-leveling sealant; you’ll probably tear the membrane! Be slow and gentle.
- Stick with the system. If you choose Henry’s Tropi-Cool 887 roof coating, use Henry’s 884 roof caulk. If you choose LiquidRubber, use their primer. Don’t invite chaos by mix-and-matching brands.
- Don’t use FlexSeal. Not to hate on FlexSeal, but I’m using it as an example. Don’t use untested home improvement products on your RV membrane roof. Many have solvents that can destroy EPDM. Others have different shrinkage rates than rubber roofs, so they’ll crack or lift over time. And others simply won’t stick to low-surface-energy plastics like TPO and PVC. Only use tested RV products!
A DIY RV roof coating is a fancy bandaid. There’s nothing wrong with that – so long as you understand what you’re getting in return.
- You’re not getting the 20-30 years you’d likely get from a new PVC or TPO roof.
- You’re not getting the waterproofing benefits of removing and reinstalling the roof components.
- You’re just extending the lifespan of your roof by 5-10 years, and at that time, you’ll probably need to replace it. Many roof coatings cannot be re-coated, practically speaking.
Option 3: Refinish!
I’ve separated DIY RV roof coatings from commercial RV roof coatings (what I’m calling “refinishes”) like RV Armor and RV FlexArmor. Here’s why:
- Firstly, these refinishes are expensive, around $170 per foot. That’s about 40-70% of the cost of a new roof.
- Secondly, these aren’t DIY recoatings. You’ll need to hire a certified professional within their network. In FlexArmor’s case, you’ll need to drive your RV to one of their shop locations.
- Thirdly, these refinishes are marketed as “lifetime.” They aren’t just bandaids. These companies stand by their work; you should expect a lifetime of 15-25 years.
The appeal of these coatings is the lifetime warranty and the “inside-out” waterproofing process, where the sealing topcoat is rolled or sprayed atop the underlying sealants. This results in a “seamless” roof coating with less need for maintenance compared to the self-leveling sealants on a typical RV roof.
Option 4: Replace!
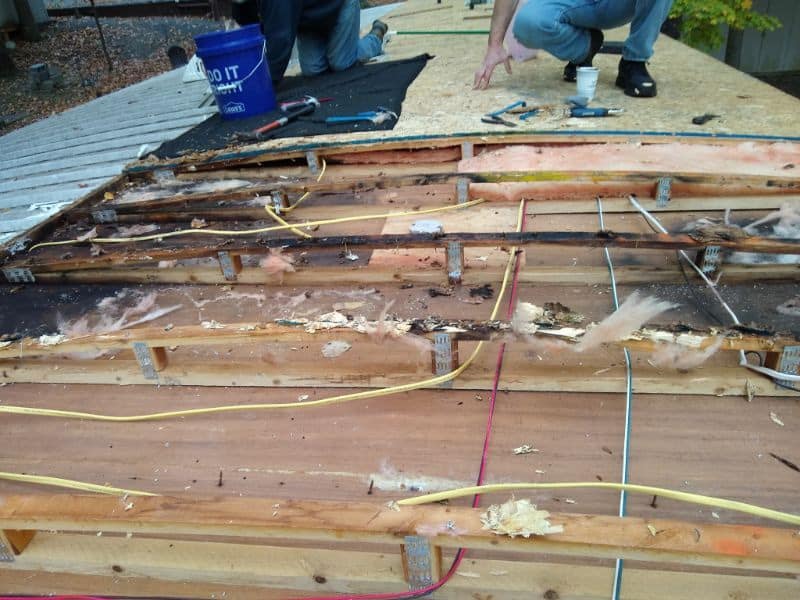
The final option is to replace your roof.
No matter how you slice it, this is a big job. If you’re lucky, all you’ll have to do is remove the old self-leveling sealant (for screw access, pull all the shrouds and covers, remove all the roof components and tote them down the ladder, remove the roof trim moldings, pull off the old membrane – and then do everything in reverse. (And don’t fall off the roof.)
In reality, most RV roofs have water damage, so you’ll probably also need to repair, replace or overlay your roof decking. Also, you should screw, sand, and tape the decking plywood seams. (And maybe replace your roof insulation while you’re at it?)
If you hire it out, it’s expensive. If you do it yourself, it’ll take at least a week, plus copious amounts of materials, tools, and ladders. It’s not a one-man show; you’ll need an assistant to maneuver the roll roofing and assist with moving materials up and down the ladder. It’s not very DIY-friendly, to be honest.
It’s a big, backbreaking job. But once it’s completed, you should expect a lifetime of 15-40 years with the right roofing membrane (don’t cheap out on the thin stuff!). And you can ensure that all your roof components and trim are properly water-sealed.
Which RV Roof Repair Option Is Best?
I’m an RV technician/engineer, not a pastor, so I’m not here to preach 🙂 On paper, replacing your RV roof membrane is always the best solution – but not all RVs past their prime are worth the full $5,000-$20,000.
You should ask yourself, “How much is my RV worth on the market?” and “How long do I plan on keeping my camper?” Based on those two answers, you’ll be able to decide on the best value.
Sometimes, a simple roof recoating is all you need to get by. Other times, a full roof replacement is the best long-term investment. And don’t forget commercial refinishes like RV Armor, which will meet you in the middle.
Leave a Reply