I swore to myself when I launched this blog that I would never stoop so low as to cover RV winterization. Every RVer on YouTube/Instagram/TikTok has their own “How to Winterize Your RV in 5 Easy Steps!” video, and I hate being white noise.
So no, I won’t be going over the basics of winterizing your RV. If you don’t know what low-point drains or water heater bypass valves are, I recommend you start with an RVing 101 How-to-Winterize Guide like this one from RVer’s Corner.
But I do want to answer a popular question: Should you winterize your RV with antifreeze or compressed air?
Comparison: Winterizing Your Camper with Antifreeze Vs Compressed Air
Unless your Owner’s Manual specifically recommends or forbids one method, either method works. You can use either liquid antifreeze or compressed air to clean out your water lines. But no matter what, you’ll need antifreeze for your drains (P-traps). And if you don’t blow out your water lines correctly, spring might arrive with an unpleasant surprise!
There’s a misconception that RV antifreeze doesn’t freeze. That’s not true. It does solidify, often well above 0 degrees. But unlike water, it doesn’t immediately expand by 9%. It’s a more gradual process. That’s why RV antifreeze has a “burst” temperature, not a “freezing” temperature.
Steps to Winterizing Your RV
I’m assuming you’re already familiar with the basics of winterizing your RV with antifreeze. It’s similar to bleeding the brakes on your car. You’re just pumping replacement fluid through the water lines. Water will freeze at 32 degrees Fahrenheit; RV antifreeze won’t hit the “burst point” until -50 degrees Fahrenheit. That’s chilly even for Fairbanks, Alaska!
Compressed air is the exact same idea, only you’re using pressured air to force all the water out of the PEX and flexible vinyl lines. Easy, right?
Pros of Winterizing an RV with Antifreeze
Most Reliable
RV tech shops usually consider antifreeze the most reliable solution for winterization. Because it mixes through pressure, not gravity, it will flow into all sorts of hard-to-reach spots: low points, valves, ice makers, etc. Because even a few drops of water around the seal of a sensitive valve can ruin the part if it freezes! BTW if that happens, here’s my guide to repairing PEX tubing in an RV.
Simple Inspection
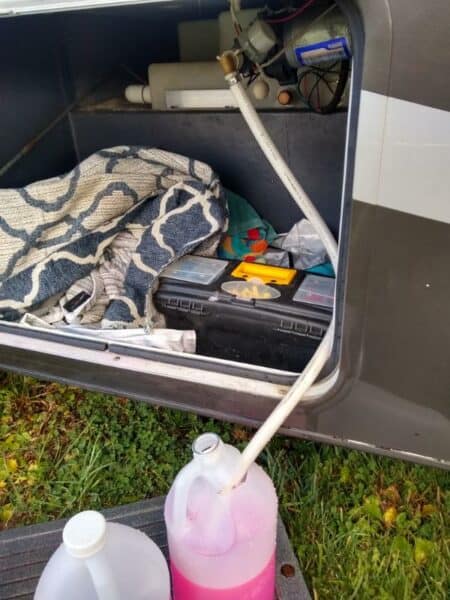
Antifreeze is easy to inspect. When you open all your taps, faucet and toilets and see pink, you know the job is done! You can also measure and compare the amount of RV antifreeze in your system, like an oil change. If you put in 1.8 gallons last year, you know you should put in approximately 1.8 gallons this year.
No Special Tools Required
Your water pump will do the dirty work of distributing the antifreeze through the water supply lines. With the addition of a 3-way valve installed upstream of your water pump, winterization couldn’t be easier.
Cons of Winterizing an RV with Antifreeze
Wasted Materials
You’ll need to pump 2-5 gallons of RV antifreeze through your system. While RV antifreeze isn’t toxic to humans in small amounts (active ingredient is either ethanol or propylene glycol), you still want to pump out as much as you can before reusing your system. RV antifreeze can be captured and recycled or disposed of in a septic system.
It Tastes Awful
If you don’t COMPLETELY purge your water lines in the spring, you’ll experience the not-so-pleasant aftertaste of RV antifreeze. And if you made the mistake of dumping a few cups in your freshwater tank (not recommended!), you’ll be tasting it for a while!
You Might Need a Hand Pump
If you don’t have a 3-way valve upstream of your water pump, you might need to hand-pump antifreeze into the system via the city water inlet. That’s annoying for anybody, but if you have arthritis, it can be torturous.
It Costs a Little Bit of Money
I hesitate to include this as a “con” because RV antifreeze is so cheap! You can buy a gallon for less than $5. You should be able to winterize your RV for $10-$25 if you do it yourself. So I would not make cost the hill you die on.
Pros of Winterizing an RV with Compressed Air
Easy Spring De-Winterizing
With antifreeze, you have to re-flush the supply lines with fresh water in the spring. But with compressed air, normal sanitation and a flush are all you need!
For this reason, compressed air has become the winterization method of choice for those who travel full-time and may experience occasional sub-freezing temperatures.
Better for the Environment
Air in = air out. There’s no wasted antifreeze to be disposed of or recycled. And no plastic jugs, which don’t get recycled as much as you would think!
P.S. Even if you decide to winterize your supply lines with compressed air, remember you’ll still need the pink stuff for your toilets and all drains with P-traps (shower, sink, etc.) About a cup of antifreeze in each drain is usually sufficient. I also think adding a little bit of antifreeze to the black and gray water tanks is cheap insurance.
It’s Not Messy
The first few times you winterize your RV with antifreeze, I recommend you wear a pair of jeans you don’t care much about! You’ll likely get some of the pink stuff on your hands. And if you discover a leak in your plumbing system, all bets are off!
Meanwhile, blowing out your lines with compressed air doesn’t require anything sticky, gooey, or wet.
Cons of Winterizing an RV with Compressed Air
You Need an Air Compressor – Duh!
At the risk of insulting your intelligence, you’ll need an air compressor to blow out the water lines. And you can’t always count on having an air compressor nearby if you need to emergency-winterize at a campground!
However, most serious RVers will purchase a portable air compressor to air up tires and run small portable power tools.
The recommended air compressor size for winterizing an RV is a minimum of a 2-gallon tank size that will deliver at least 1 SCFM of airflow @ 90 PSI.
That’s just the rating, though! Don’t blow out your lines at 90 psi! RV water supply lines are only required to survive 80 psi (even though some manufacturers test at 100 psi or above). I recommend a pressure sitting between 45 and 60 psi. Older RVs should err on the safe side!
P.S. Some types of air compressors might blow oil or other contaminants into your water supply lines. No good! Either use an approved air compressor or install an inline filter.
It’s Not a One-and-Done Process
If you’ve never winterized with compressed air before, you might think you can just blow out your lines once and call it quits. That’s not true.
You normally need to blow out your lines 6-8 times, waiting 3-5 minutes between each burst. Otherwise, water will cling to hard-to-reach spots and you’ll never get it all out. It’s not a 10-minute process.
So Is It Better To Winterize an RV With Air or Antifreeze?
Six of one, half a dozen of the other.
- The engineer in me is partial to the antifreeze. I know a displacement fluid is probably more trustworthy than compressed air …
- As an RV tech, I use antifreeze. I feel more comfortable accepting liability.
- But the RV owner in me – well, I admit that I usually use compressed air when I winterize! It’s just so much more convenient. Plus, no plastic jugs to recycle!
Leave a Reply