Last week, I replaced an RV skylight – and I’ll show you how to do it, too. Like many DIY jobs, 90% of the work is the preparation. It’s a simple job that most anyone can do, but if you want the installation to last for 10-20 years, do it right!
Here’s my in-depth, step-by-step guide to replacing your RV outer skylight dome. I’ll tell you the tools, materials, and steps you need to do the job professionally.
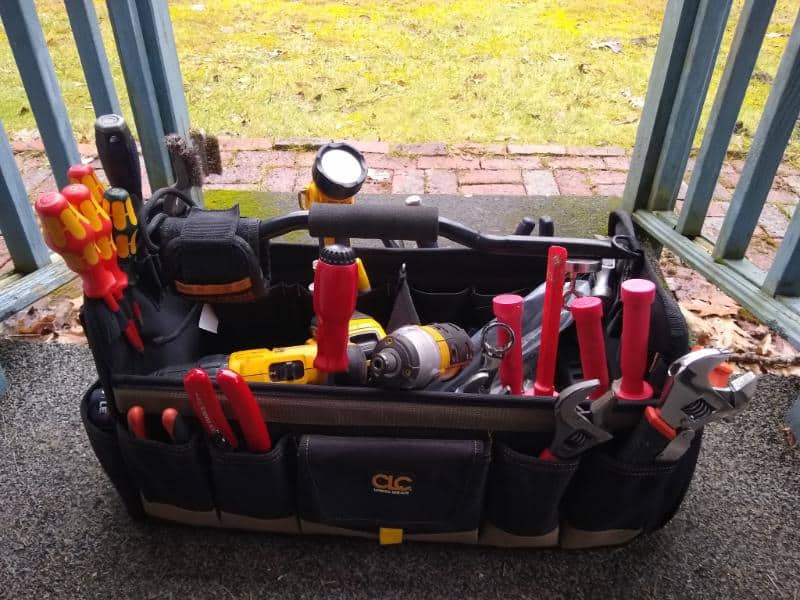
Tools >>
- Caulk gun
- Utility knife
- Plastic scraper (or other non-marring scraping tools)
- Drill or impact driver with driver bits (usually #2 square bit or ¼” hex nut driver)
- Medium-bristled brush or sponge
- 2” steel roller (opt)
- Vinyl/latex gloves
- Ladder (for access)
- Moving blankets (opt)
- Heat gun (opt)
Materials >>
- Replacement skylight (see notes below)
- 2-3 qty 10oz tubes of self-leveling sealant
- 1 tube of non-sag sealant (opt)
- 6-20 feet of ⅛” thick butyl tape
- #8×1” or #10×1” exterior pan head screws
- Soap and water
- Isopropyl or denatured alcohol
- Paper towels
- Microfiber towels
Step 0: Protect Your Roof!
If you have an RV membrane roof, you wouldn’t believe how frail the membrane can become after years of exposure to Mother Nature. Protect the side of your RV by laying down a yoga mat or moving blanket beneath the ladder rails, and protect the roof itself by wearing soft-soled shoes. Better yet, bring up some moving blankets or spare cardboard to step on, instead.
Step 1: Measure the Old Skylight Size
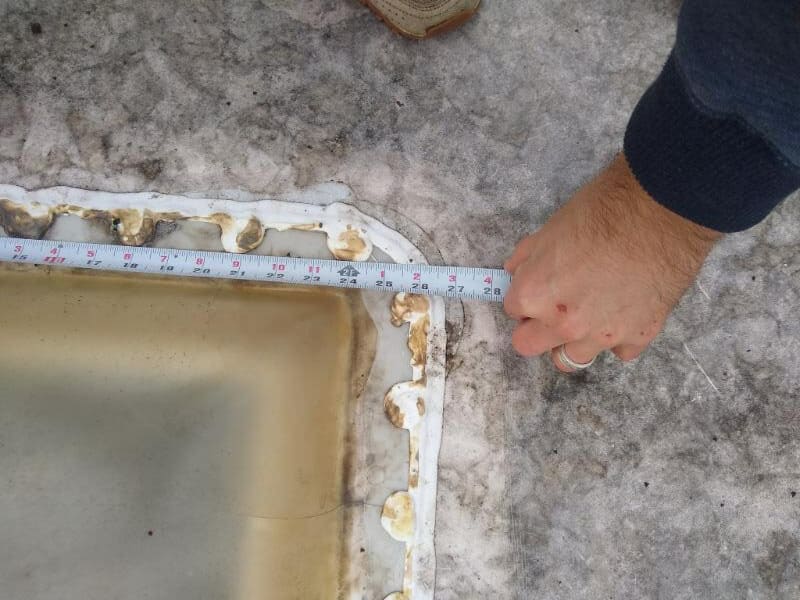
Measure the rough opening of the roof AND measure the extent dimensions of the old skylight outer dome. You’ll want to purchase something as close to the old size as possible to cover up the same screw holes.
If you’re also replacing the inner dome, take measurements of it as well. Be aware that some inner domes are designed for curved roofs, so they are smaller at one end than the other.
Step 2: Purchase a Replacement Skylight Dome
Here’s what you need to know when shopping for a new RV skylight dome:
Construction –
Cheaper RV skylights are made from acrylic (also known as Plexiglass). The more expensive skylights are made of polycarbonate, which is much, much stronger and more resistant to cracking. It may, however, yellow faster. If you’re at all worried about tree limb damage, choose polycarbonate. Prices range from $50 to $200.
Size –
Most RV skylights are 14×22, which refers to the rough opening size. The actual extent of the skylight will be larger because of the mounting flanges. There is no exact standard size or hole pattern – one brand’s 14×22 skylight may not be the same size as the next. There are other common sizes as well: 14×14 (same size as a ceiling fan), 14×30, 18×30, etc.
Shape –
RV skylights come in two shapes: bubble and rectangular. It’s a cosmetic difference only; they both shed water. The most common height for a bubble skylight is about 4”, but they come as low as 2” and as high as 6”. Check the specs!
Finish –
RV skylights usually come in Clear, Smoke, or White (frosted) finishes. All skylights will yellow over time, but Clear will yellow the fastest. White or Smoke is recommended for heat and light dispersion.
Insulation –
Conventional RV skylights are single-pane; they are simple, thermoformed sheets of plastic. You install both inner and outer domes to create a double-pane, insulated system. A few specialty skylights may be thermoformed double-pane, but these are rare.
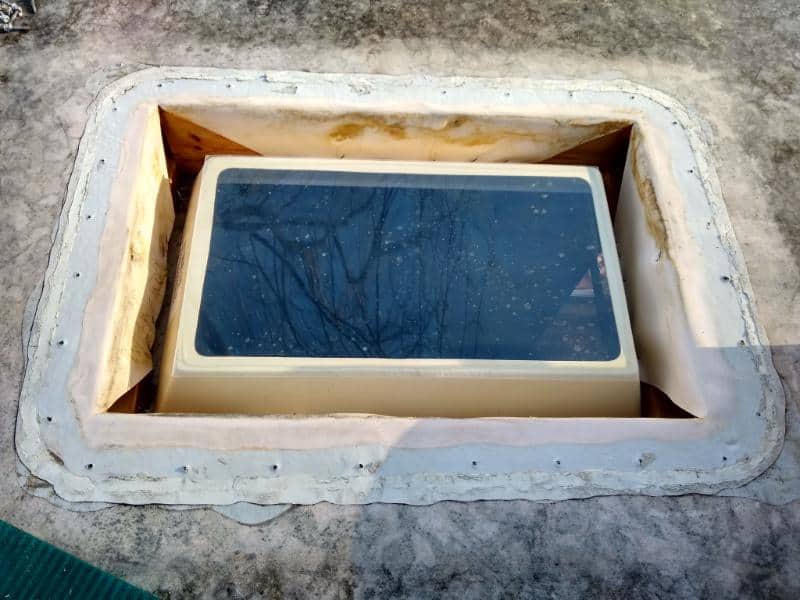
Step 3: Remove the Old Skylight Cover
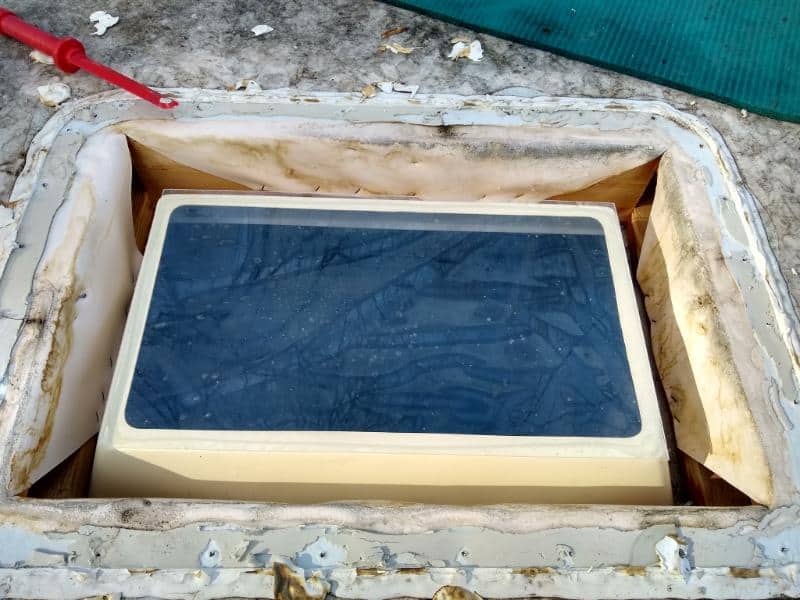
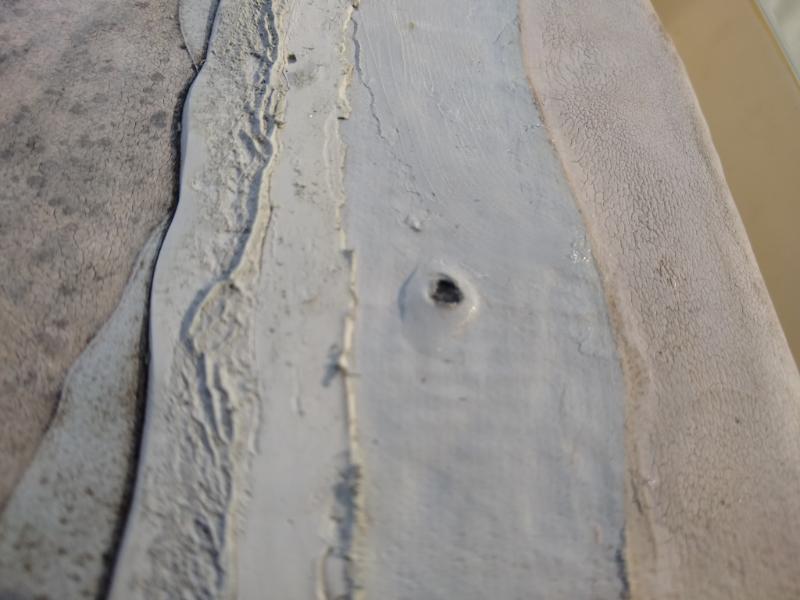
Remove the self-leveling sealant. Depending on how old your skylight is, this may be a 5-minute or a 1-hr job. If the sealant is old and flaky, you can scrape it away with a plastic chisel or scraper. If the sealant is relatively new and sticky, you might need an oscillating saw with a scraper blade, putty knife, and very steady hand!
Psst … in cold weather, you can use a heat gun to soften up the old sealant to make it easier to scrape off.
BE CAREFUL SCRAPING OFF THE SEALANT! Your roof membrane roof is no thicker than a dime. It tears very easily. If you can’t remove all the old sealant, just remove as much as possible to expose the clean, fresh stuff underneath. Once you’ve achieved a reasonably flat and clean surface, your job is done.
>>> READ MORE: Do you have damage to your roof as well? Learn more about your options to fix your RV roof!
Once you’ve removed the self-leveling sealant, you can unscrew the old skylight and set it aside. If you want, save the screws. If not, come prepared with #8×1” or #10×1” sheet metal pan head or hex head screws, preferably self-drilling stainless steel.
Your skylight probably comes with pre-drilled pilot holes, but if not, any regular twist drill bit will work. Ensure the pilot holes are large enough that the screw threads do NOT engage in the skylight itself! This can cause future cracking.
P.S. Take this time to inspect the inside of your roof. If you see mold, mildew, mouse nests, or signs of water damage, now is the time to fix it!
Step 4: Prep the New Skylight Installation
ALERT! If you’re worried about lining up the skylight properly, then BEFORE YOU PREP THE SKYLIGHT, do a dry fit. Line up the skylight above the opening and then use a fine-point permanent marker to trace the outline (or mark each corner).
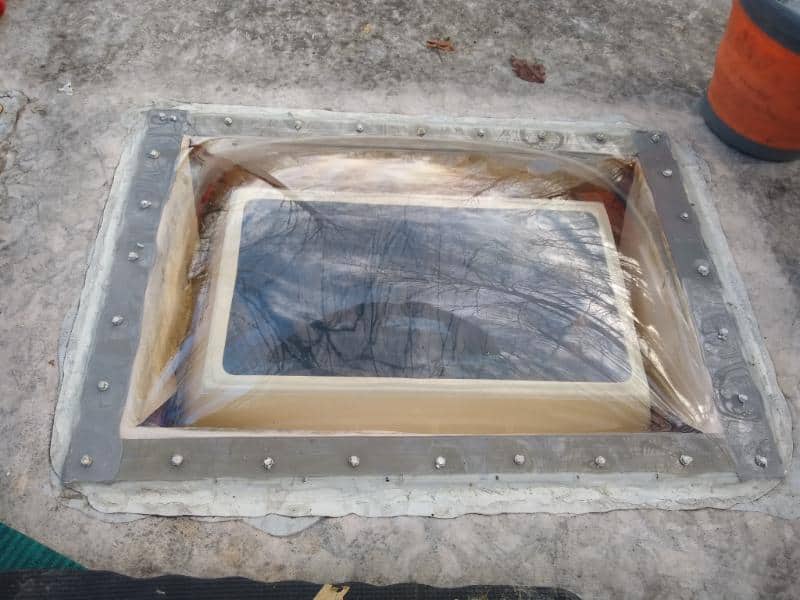
Skylights require a gasket underneath the mounting flange. You can either use two side-by-side layers of 1/8×3/4” butyl tape, one layer of 1/8×1-½” butyl tape, or gunnable butyl rubber sealant. Remember to overlap the tape at the corners by ½”.
Caution: DO NOT use any other kind of sealant or caulk, such as silicone. This stuff must be removable in the future without damaging the roof membrane.
Gently wipe down the skylight flange with a microfiber cloth and isopropyl alcohol to clean it. Avoid using harsher chemicals.They’ll turn any old sealant into a gummy mess, and they may mess up your roof membrane, too.
Wait a few minutes for the alcohol to flash off, and then apply the butyl tape. Use a 2” steel roller to press the tape firmly for good adhesion; avoid touching the bare tape with your oily fingers.
If you have leftover screw holes in the roof from the old skylight, now is the time to waterproof them! Get some non-sag sealant (or the gunnable butyl rubber) and squeeze a thimble’s worth of sealant into each old screw hole. Let the sealant cure.
Psst … You could consider covering up the holes with RV roof repair tape, but be warned! That tape is another potential point of failure! If you have a heat-weldable RV roof membrane, you should consider permanent patches.
Step 5: Install the New RV Skylight
First, you need to thoroughly clean and prep the area. If you’ve scraped off 90%+ of the old sealant, this will be easy. Use your choice of RV roof cleaner/degreaser (or just soap and water) and a medium-bristled brush or sponge to scrub the area. You need to remove any grime or mildew that has built up over the years.
Once the area has been cleaned, wipe it down with a wet rag followed by isopropyl alcohol. Let it dry for at least 5 minutes.
Now, carefully position the new skylight over the opening and set it into place. The butyl tape is extremely tacky, so be careful! With the skylight nudged into its final position, get the 2” roller again and carefully apply pressure to the mounting flanges of the skylight (don’t roll too hard, especially if the skylight is acrylic).
With your impact driver or drill and mounting screws, begin screwing down the skylight. Place a screw in each corner and then work your way around. The screws should be snug but not over-torqued; you don’t want to crack your new skylight! Screw until the butyl tape begins to squeeze out from underneath the flanges.
Step 6: Finish With Self-Leveling Sealant
ALERT! P.S. If you have a RE-COATED RV ROOF, read the instructions from the coating manufacturer! Most RV rubber roof coatings have patch kits that you can use to re-flash new installations.
>>> READ MORE: Looking for self-leveling caulk? Check out my list of favorites here!
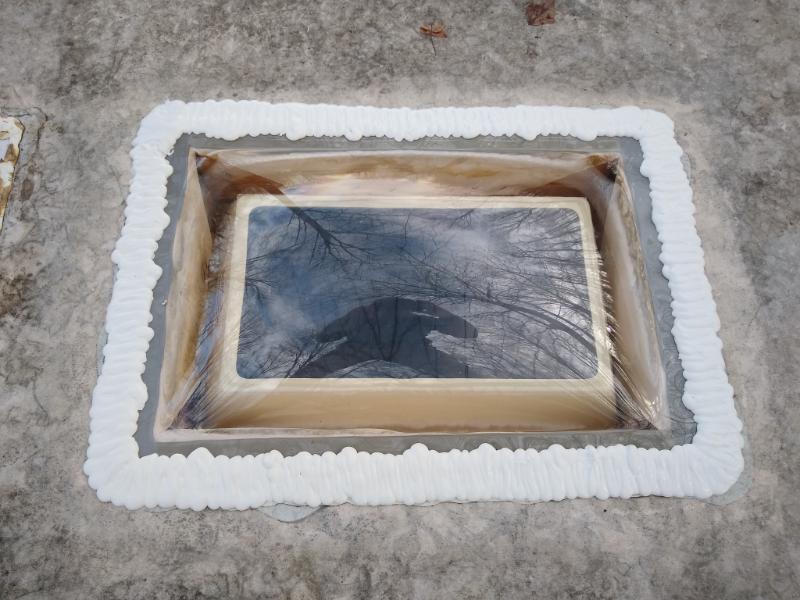
Contrary to popular belief, your self-leveling sealant DOES NOT waterproof the skylight. If you’ve done your job right, the skylight should already be waterproofed. The self-leveling is a flashing only, something to direct water away from all your hard work. It’s the belt-and-suspenders approach.
Ensure that the self-leveling caulk you’ve purchased is approved for use with your roof type: EPDM, PVC, TPO, aluminum, or fiberglass. Also, make sure it’s not expired (check the date code).
Because you’ve already prepped and cleaned the area, you can get right to work. Cut the nozzle of the self-leveling 10oz tube at the size for a ¼” – ⅜” bead and start caulking!
Here are some tips for properly applying the caulk:
- You can either run a single fat bead around the perimeter of the skylight and then put an individual blob over each screw head, or you can caulk in a squiggly back n’ forth pattern.
- Go slow. Avoid trapping air in the caulk. These become hidden hollow pockets, perfect for water to sneak inside.
- In cold weather, you can use your heat gun to help soften the self-leveling caulk and let air escape.
- Caulk should be stored at a temperature higher than 50 degrees Fahrenheit so it flows easily out of the nozzle and cures properly.
If you’ve done your job correctly, you should NOT be able to see the edge of the skylight printing through. The mounting flanges should be completely covered with seamless liquid flashing – no bubbles, no gaps, no cracks. Self-leveling does not need to be tooled.
P.S. If your self-leveling cracked when it cured, then you either have a bad/expired tube of sealant (and need to start over) or you purchased some cheap junk that’s 40% solvents (and you should probably start over). You don’t want any surprise roof leaks!
Conclusion: Enjoy Your New Skylight!
In 1-2 hours, you should have a brand-new skylight properly installed on your RV roof. Inspect the self-leveling twice per year and clean the skylight with a microfiber cloth to avoid scratching the plastic. Enjoy the sun!
Leave a Reply