Every RV roof should be inspected twice annually. Develop the habit of inspecting the roof in the spring and fall. If you store your RV outdoors, inspect the roof after every major weather event. You never know when a tree limb might decide to impale your ceiling!
Every 3-8 years, you will likely need to replace your self-leveling sealants on your roof. These are the flashing sealants that help waterproof almost every component on your roof: ceiling fans, skylights, pipe caps, antennas, etc. The only component that is NOT sealed with self-leveling caulk is usually your air conditioner, which relies on a thick foam gasket instead.
Should I replace my own roof lap sealants?
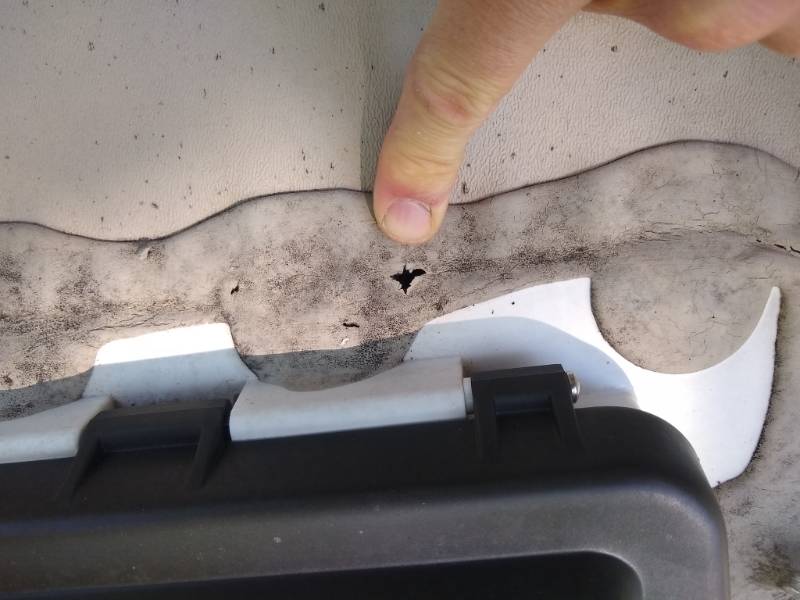
If you’re physically healthy and don’t mind crouching, bending, and squatting for a few hours, then replacing your roof sealants isn’t that difficult. It’s an essential piece of maintenance that pays dividends. When you notice that your self-leveling caulk is starting to peel, crack, flake, or crumble, you know it’s time for a replacement.
Some people or companies (cough, cough) will tell you that it’s fine to just slop the new self-leveling (aka, lap sealant) caulk over the old. I recommend against this. A far better practice is to remove as much of the old sealant as possible, clean and dry the area, and then apply new lap sealant.
This post is NOT a full instructable on how to remove RV lap sealant. Instead, I want to offer some how-NOT-to’s, learned mostly from the school of hard knocks.
Wait … why can’t I apply new lap sealant over old Dicor?
I’m repeating myself, but again, I don’t recommend applying new lap sealant over old lap sealant. Yes, some sealant manufacturers, like Dicor, will tell you that you can clean the old lap sealant and apply the new stuff on top.
That works in a fairy-tale world, but here in the real one, I think it causes more problems than it resolves.
- For one, you can’t keep applying new sealant every few years. You’ll drown your roof in sealant, and when the base layer finally starts flaking, you’ll be cursing the son-of-a-gun that ever thought applying three layers of Dicor was a good idea.
- For another, it’s hard to genuinely clean the old lap sealant. You need to remove all debris, dust, mold, mildew, slime, and other gunk, plus scuff the surface with a Scotchbrite pad. Soap and water won’t do the trick; mold can still grow. By the time you’ve expended the energy to thoroughly clean the old self-leveling, you’d have spent just as much time removing it!
- Lastly, new sealant over old is just a Band-Aid. It doesn’t do much more than add UV protection. It doesn’t fix pinhole leaks, micro-cracks, or a failed glue bond, which is what I see more commonly.
If I were inspecting a brand-new RV with a couple of missed spots, then yes, I would just apply a new layer of sealant. But once your lap sealant ages, it should be removed and replaced.
Don’t leave the old sealant intact
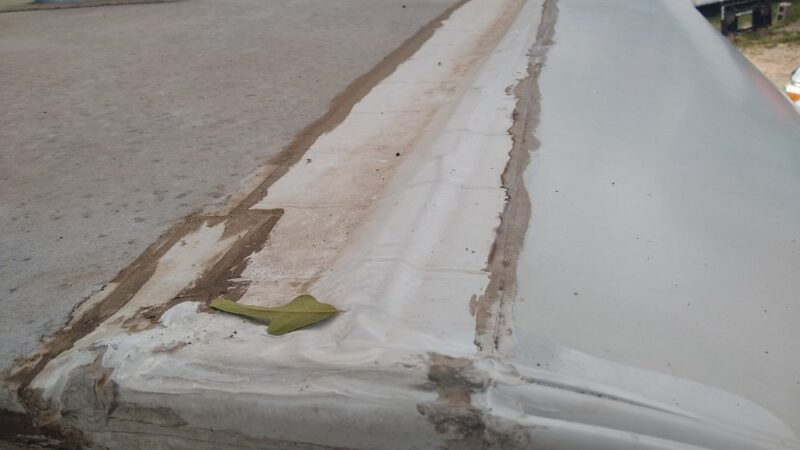
To recap: I recommend removing as much of the old self-leveling sealant as possible. I don’t like the lazy man’s way of just cleaning the old stuff and gooping on the new stuff. Some people just try to scrape off the loose sealant, but in my experience, it’s hard to know what’s loose and what isn’t. With a plastic scraper and oscillating tool with scraper blade, you can make quick work of the old stuff.
>>> READ MORE: No, You Shouldn’t Apply New Lap Sealant Over Old Lap Sealant!
Don’t use a razor blade
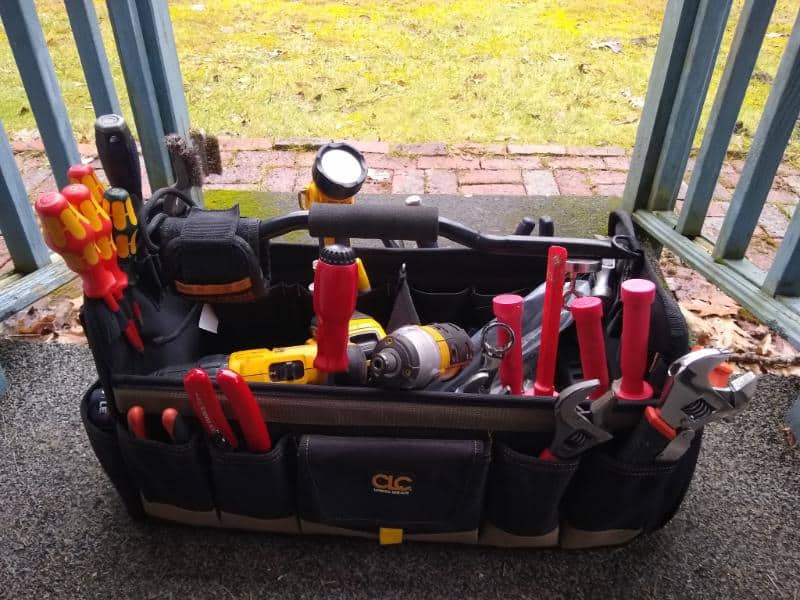
Don’t use metal razor blades, utility knifes, or metal scrapers to remove old sealant. One slip, and they’ll cut through a rubber RV roof like butter. Use a plastic scraper or a plastic chisel instead. These are non-marring tools that are less likely to cut through rubber or scratch gel-coated fiberglass.
Don’t blindly trust EternaBond tape
Some well-intentioned but mistaken RVers believe that EternaBond, being the best thing since sliced bread and indoor plumbing, is adequate roof flashing. Instead of applying self-leveling sealant, they flash the roof components with 4” EternaBond tape.
Personally, I don’t recommend substituting any RV roof repair tape for self-leveling sealant. EternaBond is very difficult to remove and doesn’t stick very well to all surfaces, such as silicone roof coatings and polished acrylic skylights.
If you want to do the belt n’ suspenders approach, seal the roof component with self-leveling like normal, and then once the sealant has cured for at least 48 hours, follow it up with 4” or 6” wide EternaBond tape or similar. (This is similar to what’s done on slide-out room roofs). You’ll still need to inspect the roof at least twice a year. EternaBond might last 30 years in a laboratory, but it doesn’t always last so long in Mother Nature!
Don’t trade manual labor for chemicals
Scraping off sealant is no fun. It’s hard on the knees, the wrists, the neck, and your sense of humor. There are no shortage of chemical-ly products that promise to make the job easier. Most of them, in my opinion, are not worth their shelf space. Sealants are specifically designed to resist most common solvents (otherwise what good would they be?). Most solvents just turn the caulk into a goopy mess that is just as difficult to clean up, and many can damage or wrinkle an RV rubber roof. Elbow grease, I’m afraid, is the best tool in your box!
The proper use for chemical solvents is cleaning the work area once the sealant has been mechanically removed. Use acetone, alcohol, or xylene to wipe down the area and remove any loose residue. Don’t try to melt away the original lap sealant with solvents!
Don’t fret about ALL the old sealant
Am I contradicting myself? Haven’t I been preaching how important it is to remove the old caulk? Well, yes, you should remove as much of the old sealant as you can, but you probably can’t remove all of it – nor should you try! Sometimes, the old sealant cannot be 100% removed without risking damage to the roof membrane. Scrape off as much as you can, but don’t fret about a little bit of residue. If it’s clean and stuck to the roof, it isn’t doing any harm.
Don’t use mineral spirits (only)
Mineral spirits doesn’t evaporate completely. It leaves a thin petroleum residue which can contaminate the bond of the new sealant. If you use mineral spirits, follow it up with an evaporative solvent like isopropyl alcohol to leave a clean, film-free surface.
Don’t use silicone caulk (most of the time)
Generally, silicone is NOT the right choice of self-leveling sealant. (Yes, they do make self-leveling silicones; they are very popular in residential masonry). I’ve already shared some reasons why here. You should use the self-leveling sealants approved for use with your roof chemistry.
Don’t mix and match types of lap sealant
If you are removing the old sealant completely, then yes, you can substitute whatever brand of lap sealant you want. But whenever possible, use the same product across the entire roof!
Every roof membrane manufacturer will have a list of sealants that are approved for use with their roof. The three largest brands are Dicor, Alpha Systems, and XTRM PLY by LaSalle Bristol, and they all have a list of in-house approved sealants. When in doubt, go with their recommendation. If you have a van or RV with a sheet metal or fiberglass roof, check your RV Owner’s Manual for a lap sealant recommendation.
If you do decide to forge your own path, read the instructions carefully! Some self-leveling is not approved to direct contact with galvanized steel; you’ll need a primer. Some is rain-ready within 4 hours; some, not for 48 hours. Many are not approved for use with PVC roofing membranes or acrylic skylights. Some homework may be required.
Don’t plan the job for a cold day
Cold is the enemy of an easy roofing job. I would think twice about removing and replacing your roof sealants if the temperature is below 50 degrees Fahrenheit.
- The lap sealants will stiffen and be difficult to scrape away.
- The new lap sealant will be thick, viscous, and hard to apply.
- Most sealants require extended time above 50 degrees to cure and bond properly.
If you’re doing the job anywhere between 45 and 65 degrees, you may find that a heat gun or blow dryer comes in handy. Heat softens the old sealant and makes it easier to peel away (although too much heat will turn it into chewing gum). You can also store the new sealant in a “hot box” or other warm location so it’s easier to gun out of the tube.
Don’t trust lap sealant for waterproofing!
One of the biggest misconceptions about RV maintenance is that resealing your RV roof will stop leaks. That’s NOT the point of maintaining your roof sealants. Stopping leaks is purely incidental and accidental.
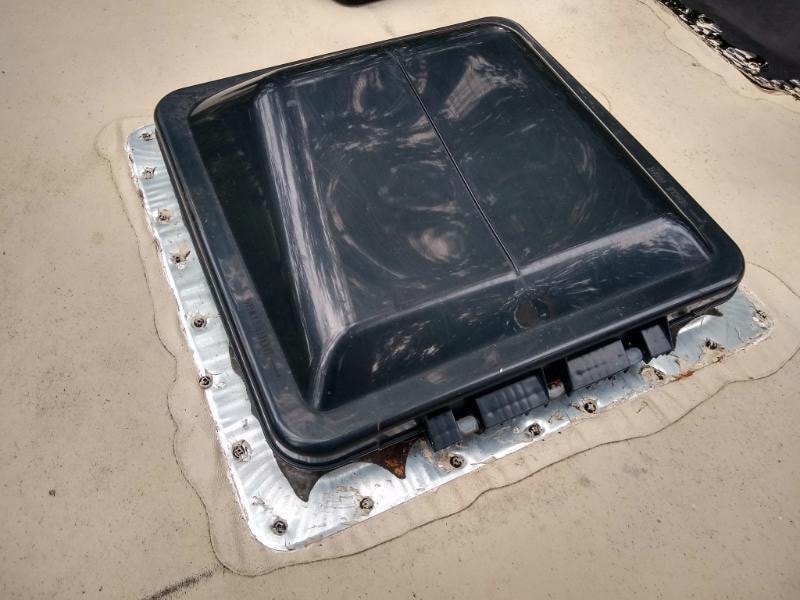
Let me explain. Remember that butyl gasket? Well, the gasket underneath the mounting flanges of your roof components is the primary water barrier. The cap sealant is (supposed to be) just a flashing, something to redirect water. It’s a belt n’ suspenders approach.
So if your skylight, for example, is leaking, don’t just replace the self-leveling sealant. You need to remove and reinstall the skylight with a new butyl gasket AND new lap sealant.
>>> READ MORE: An RV Technician’s Guide to Replacing Your RV Skylight
Leave a Reply