Every RV owner knows a water leak sounds the death knell. But did you know water can ruin your camper without ever leaking inside??
Meet condensation. Condensation sucks. Condensation can:
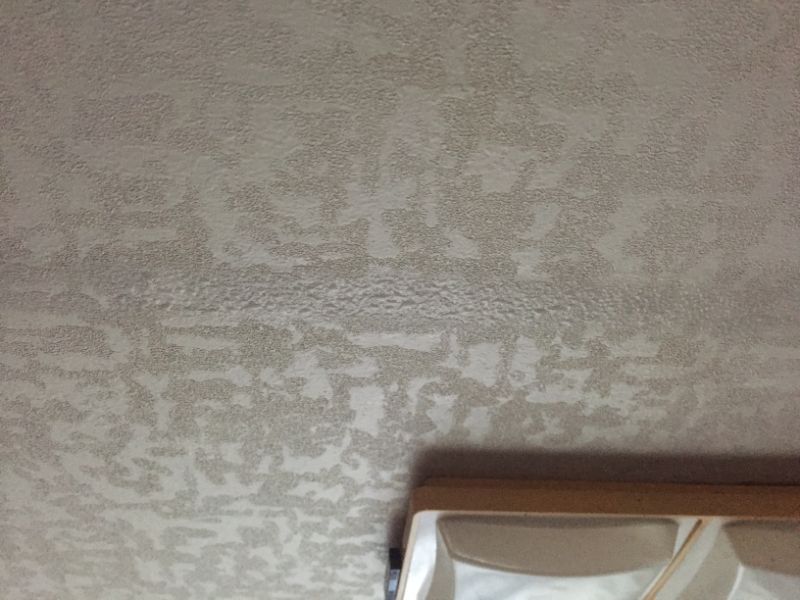
- Stain your wallpaper
- Grow mildew on your clothes
- Funk up your RV with a wet-newspaper-y smell
- Disintegrate plywood paneling
- Soak into your subfloor
- Corrode aluminum and rust steel parts
- Grow mold inside your walls!
Here’s how to control the condensation inside your RV camper.
A Small Science Detour (Feel Free to Skip)
The Psychrometrics of Condensation
Simply put, hot air holds more moisture than cold air. The amount of moisture in air is called (as you know) humidity.
We normally measure atmospheric moisture as relative humidity, where we’re comparing how much moisture there is (say, 40%) to how much there theoretically could be (100%, aka raining).
When air cools, it cannot hold as much moisture. Think of slowly squeezing a wet sponge or wringing out a towel. Eventually, water will seep out of the sponge. Air works the same way. When air cools until relative humidity hits 100%, it’s at the dew point.
At the dew point and colder, water will condense out of the air as water droplets, aka condensation.
That’s why windows fog up in the winter. Frigid outdoor temperatures cool the surfaces of the glass pane below the dewpoint of the more humid air inside your house. When air hits the glass, moisture gets “squeezed out” as dew or frost on the glass, depending on whether the glass is above or below freezing.
So science tells us that we have two basic tools to control condensation.
- Increase the temperature
- Decrease the humidity
What Causes Condensation in an RV?
So why do RVs contend with so much more condensation than, say, your house?
You’re the Problem!
Not to be rude, but you’re the real problem.
I’m not joking. You are, quite literally, the problem. You perspire moisture out of your skin pores. Your respirate moisture from your breath. You are a little walking, breathing cloud-in-the-making.
Living Activities
What you do inside an RV can also release moisture.
- If you make coffee or boil peanuts, you’re releasing steam (aka water) into the air!
- Taking a shower releases a ton of moisture!
- Certain adult activities can fog up the windows real quickly! (so I’ve heard).
Leaks & Drafts
Leaking air around doors, windows, air conditioners, and roof fans can allow moisture to tiptoe inside. Humidity travels from wet to dry, so if the outside is more humid than the inside, any air drafts will humidify your living space! (This is more a problem in summer than winter).
Super-Nerd Fact: Unlike a house, vapor drive is not a significant source of water entry into an RV, because most of the exterior surfaces are practically vapor-impermeable.
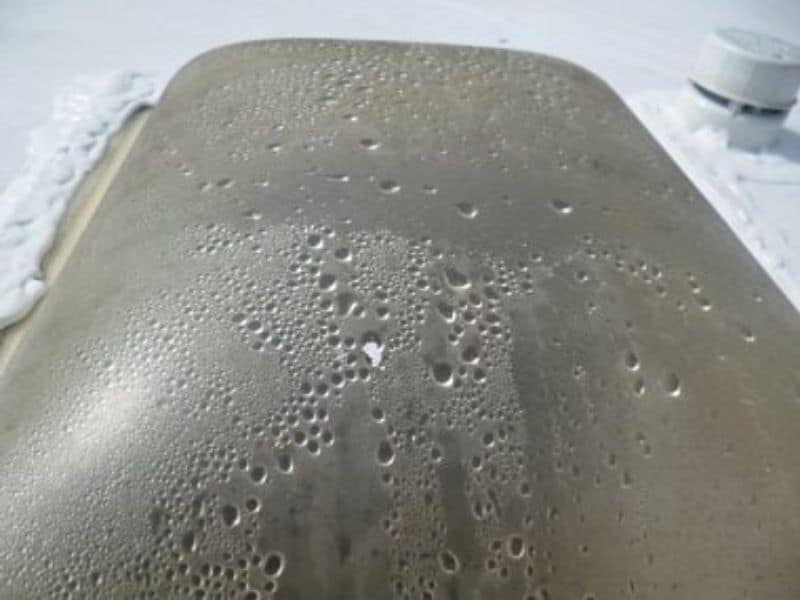
Thermal Bridging
Metals, like aluminum and steel, allow heat to conduct much faster than, say, wood or foam. In cold weather, condensation can form around aluminum wall framing or aluminum roof trusses, like you can see below.
Propane Appliances?
Contrary to popular belief, your basic appliances should not add moisture inside your RV. Don’t blame your furnace, water heater, or refrigerator. They exhaust their gasses (and moisture) outside, not inside!
The big exceptions to this rule are:
- Your propane stove.
- Any portable catalytic heaters
Any “vent-free” or “ventless” propane-burning appliances will add moisture to your interior living space (about 1.6 pounds of water for every 1.0 pounds of propane burned!)
In Sum: Unfortunately, since the main source of humidity is yourself, there isn’t much besides not cooking or showering inside your RV that you can do to eliminate water sources.
Instead, we need to think up clever ways to reduce the humidity inside our rigs. We’re constantly making our RVs more humid – so we need to get rid of that stuff!
The ideal relative humidity is 40-50%, no higher than 60%.
Let’s begin (in no particular order).
18 Tips for Reducing Condensation Inside Your RV!
1. Follow the (Good) Weather
On a macro level, you could always travel to Arizona in the winter or stay west of the Mississippi!
But even on a micro level, you can adjust your camping location to take advantage of favorable weather conditions.
- Valleys tend to be more humid than hills
- Clear nights tend to be colder
- Large bodies of water hold their temperatures
- Seek out mountain rain shadows
2. Insulate Your Windows
Most RVs use single-plane glass windows. These windows lose a LOT of heat and easily condensate in cold weather.
You can buy (or make your own) upholstered bubble wrap or Reflectix window covers. Ashley Mann from RVInspiration.com is a big fan of these! You can view her tutorials here.
3. Draft-Proof Your Door
Most RV doors only use a single D-bulb or Q-shaped rubber weatherstripping gasket. If that gasket cracks, breaks, or comes loose, air can enter the RV. Also, entry doors tend to warp over time, which can cause more air gaps.
Take a close look at the door seal. Ask your partner to stand outside and shine a flashlight around the door. If you can see daylight, that’s a leak!
You can replace the weatherstripping, add an additional layer of squishy foam, or even add barrel latches to clamp the entry door tight.
4. Turn On a Roof Fan
Any time you shower or cook in an RV, you need to turn on the roof fan! Get rid of all that moisture!
Pro Tip: Also open a window while you run your roof fan. Air out must equal in. If you don’t open a window, your roof fan might create a vacuum, which can suck moist outside air into your walls!
Circulating fresh air around your RV can also help eliminate gross smells and odors.
5. Take Navy-Style Showers
I admit it: No one likes Navy-style showers. But taking a shower inside your RV is the equivalent of a mini thunderstorm. And the hotter the water, the more steam released.
- Wet your entire body.
- Turn off water.
- Lather up!
- Rinse off.
- Towel off. You’re done!
6. Plug In a Dehumidifier
If you’re connected to the grid, just plug in a portable dehumidifier.
But which kind of dehumidifier is the best??
You have three options:
1. A Refrigerant Dehumidifier
These dehumidifiers operate on a vapor-compression cycle, much like an air conditioner. They have a condenser, evaporator, compressor, all that jazz.
- PROS: These dehumidifiers can extract a LOT of moisture from air, whether hot or cold!
- CONS: They are expensive, can be loud, somewhat heavy, and must be plugged into shore power.
Best of all, they can help keep your RV warm in the winter and cooler in the summer!
2. Mini Dehumidifier
These mini RV dehumidifiers use thermo-electric (Peltier) technology.
- PROS: They are affordable, whisper-quiet, and effective in small, contained spaces.
- CONS: These products can only extract a few ounces of water a day. They don’t work well below 40-50 degrees or relatively low humidity. They don’t dehumidify large spaces well.
3. Desiccant Dehumidifier
… which I talk about in the next section.
On paper, a real dehumidifier is a better buy. If you need to run your dehumidifier during the day, they are really the only option.
But if you only occasionally deal with minor condensation on autumn mornings, though, you might get by with a mini dehumidifier. You can turn it on at night, sleep away, and hopefully the lil’ guy will extract enough water to prevent condensation by morning.
7. Use a Desiccant
“Desiccant” is a fancy word for a material that absorbs moisture. You know those silica gel packets in the bottom of your shoes that say “THROW AWAY – DON’T EAT!”? Those are little desiccant packs!
To be frank, desiccants aren’t very useful when traveling in your RV. They just don’t absorb moisture fast enough. Similar to mini dehumidifiers, desiccant dehumidifiers work best at night (when all doors and windows stay closed), not during the day.
However, desiccant packs are a great solution for getting rid of condensation while your RV is in storage! You can buy packages from brands like Sta-Dri, Delta, and DampRid. These packs might use ingredients like activated charcoal, vermiculate, silica gel, or natural clay.
8. Circulate the Air
Sometimes, condensation happens because of temperature differences across your RV. It may be humid in your bedroom but dry in your kitchen, for instance.
By circulating air in your RV, you eliminate cold spots. You eliminate isolated condensation, such as on glass window panes or around aluminum tubing hidden in the walls.
- Open your cabinet doors
- Open partition curtains
- Turn on a small fan, or two
- Turn on the ceiling fan (if you have one). The blades should spin clockwise!
9. Avoid Parking Near Water
On second thought, this is an awful idea. What’s the point of traveling in an RV if you can’t enjoy a lovely lake, placid pond or awe-inspiring ocean?
So ignore this advice. Camp where you want!
10. Clean Out Your Appliance Vents
Your furnace, water heater, and refrigerator exhaust their combustion gasses (and moisture) to the outside.
If their vents get blocked, then A) you’re filling your RV with toxic gases and B) you’re trapping moisture, which can condensate.
Appliance vents can become blocked from road grime, spiderwebs, mud wasps, mice nests, snow, etc.
At least once a year (certainly before and after seasonal storage), make sure all your vents are cleaned and screened!
11. Don’t Abandon Your RV Outside
RVs do best when babied. When you leave your RV outside to fend for itself, there’s a good chance you’ll get condensation problems.
The basic problem is that temperature and pressure differences between the inside and outside of your RV will force air transfer. No RV is completely airtight – air will find its way around marker light holes, through window gaskets, etc.
And once moisture gets inside your RV, it’s hard to get out.
When you park your RV unprotected, uncovered, in the elements, you’ve basically turned your RV into a solar still. If you live east of the Mississippi, condensation is almost guaranteed.
If you can’t store your RV indoors, at least invest in a cover or carport.
12. Stop Cooking Inside Your RV
Cooking tends to release all sorts of moisture into the air.
- The propane stove itself releases moisture into the air as it burns propane!
- Boiling, simmering, or otherwise cooking food usually releases steam vapor.
If you cook on the stove, cover your skillet with a lid, and wait for water to condense on the underside of the lid before removing. Or open a window while cooking!
13. Run the Air Conditioner
Air conditioners, by their nature, dehumidify air. When the air is cooled, water gets squeezed out.
So if you’re dealing with humidity in warm weather (aka, the eastern U.S. March – November), turn on that air conditioner!
Fair warning: A cheap, generic “portable air conditioner” doesn’t count! Most portable air conditioners actually increase humidity because they’re disguised little swamp coolers! You need a real compressor-cycle air conditioner, either a rooftop, window, or under-bunk (aka Dometic CoolCat) unit.
14. Add RV Skirting
As I talked about in my tips to camping in winter, RV skirting should be your first defense against frigid temperatures. Most RVs, especially travel trailers, lose A LOT of heat through wind across the bottom of your floor. Skirting insulates your RV from convective air drafts.
While I haven’t used their products myself, AirSkirts seem to be taking the market by storm – and wow, do they seem cool! I particularly like how they deflate and stow away when not in use, making them the best skirts for RVers on the move.
15. Elevate Your Mattress
A damp mattress is disgusting. It’s a common source of mold (or worse) in many RVs. Some types of mattresses, like cotton shikibutons, are designed to be flipped and aired out in the sun every 3-6 months!
If you don’t have a flippable mattress, consider elevating your mattress using an airflow system. Popular choices include the Froli sleep system and the Aire-Flow HyperVent mattress underlayment.
Also, if you hate your mattress, here’s how to make it more comfortable.
16. Insulate Your RV
Well-insulated RVs don’t experience the massive temperature swings or draftiness of cheaper, lesser insulated rigs.
Unfortunately, this is one of the hardest DIY upgrades you can choose! Here are some ideas:
- Add 2-inch foam board insulation beneath the subfloor
- Fill the underbelly with loose fill mineral wool insulation
- Hang upholstered insulation rectangles on your wall and ceiling
- Insulate the back walls of cabinets and cargo areas
Psst. If you think your “4-season RV” is already 100% insulated, think again!
17. Use Towels Below Windows
Condensation runs downhill. A common source of damage for RVs is condensation from windows, which runs down the wall, seeps into the edges of the subfloor, and disintegrates your OSB from the inside out!
So catch the water before it has a chance to do serious damage. Place towels, bath mats, or other water-absorbent material beneath windows.
For more background information on preventing subfloor damage from water leaks, see my guide to different types of RV subfloors.
18. Re-Seal Your Camper
Old, flaky exterior seals can allow massive water leaks inside your camper! Or even if no leak occurs, dried out seals (especially around windows) are a common source of air drafts.
- Re-seal your RV roof components with self-leveling sealant
- Re-caulk your RV sidewall components with non-sag sealant
- In severe cases, you might need to reinstall your windows or doors with new butyl tape and cap sealants.
Here are some more helpful resources about sealing the outside of your RV:
- If you suspect an interior water leak, such as leaky PEX plumbing, track it down with the help of my guide here.
- Or if you suspect an external leak, such as from loose roof-edge trim, then you might be interested in this advice about sealing the outside of your RV.
- If you need suggestions about which caulk or sealant to buy, I’ve shared my recommendations.
Leave a Reply